What is io.net ?
io.net, a decentralized network built on the Solana blockchain, is addressing the growing computational demands of artificial intelligence (AI).
io.net has raised $30M to build the largest decentralized GPU network in the world and solve the AI compute shortage.
To further incentivize participation and community building, io.net has launched its “Ignition” program, offering an airdrop of its native token (IO) scheduled for launch on April 28th, 2024.
Ignition Program and Airdrop Potential
io.net launched “Ignition,” a program rewarding GPU suppliers and featuring community quests on Galxe to earn points redeemable for the potential IO token airdrop, scheduled for launch on April 28th, 2024. The io.net airdrop is attractive for several reasons. First, the $30 million raise at a $1 billion valuation suggests strong investor confidence, potentially translating to valuable airdrop tokens. Second, the program’s defined end date and token launch on the same day discourage excessive point farming, fostering balanced participation. Lastly, the recent AI boom positions io.net’s airdrop as a timely event capitalizing on market momentum.
How to Participate in the io.net Airdrop
1. Become a GPU Supplier
- Set up your node: Download and install the io.net software from the official website here.
Windows
- It’s essential for users to ensure that their GPU version is supported by io.net’s platform. This information should be available in the documentation or specifications provided by io.net under the “Supported Devices” section.
- Download Software/Drivers and Install Correctly
- docker
- Visit docker.io , download Docker Desktop, and install it
- You can check the version of Docker you have installed with the following command from a terminal prompt
docker --version

- Nvidia Drivers
- Go to the Nvidia website and type in your GPU’s name, then click on search
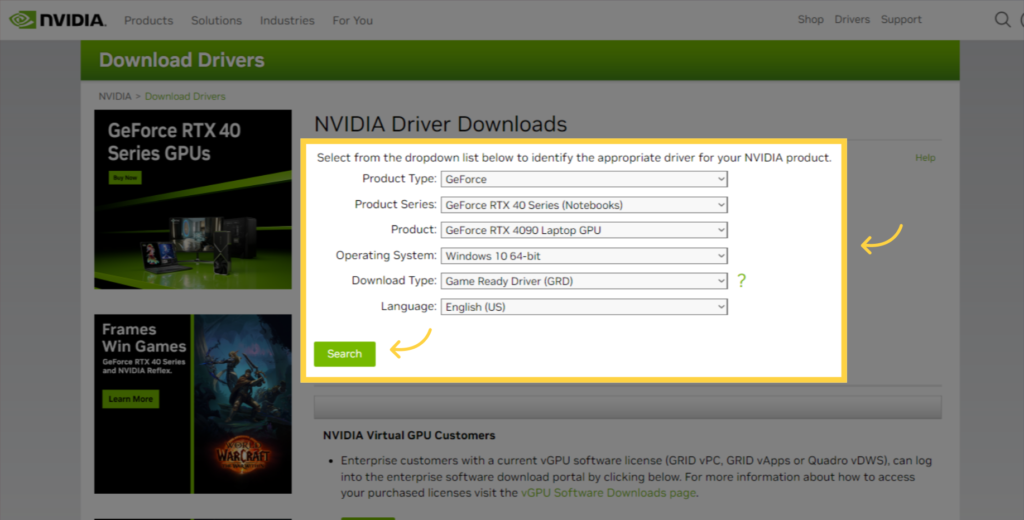
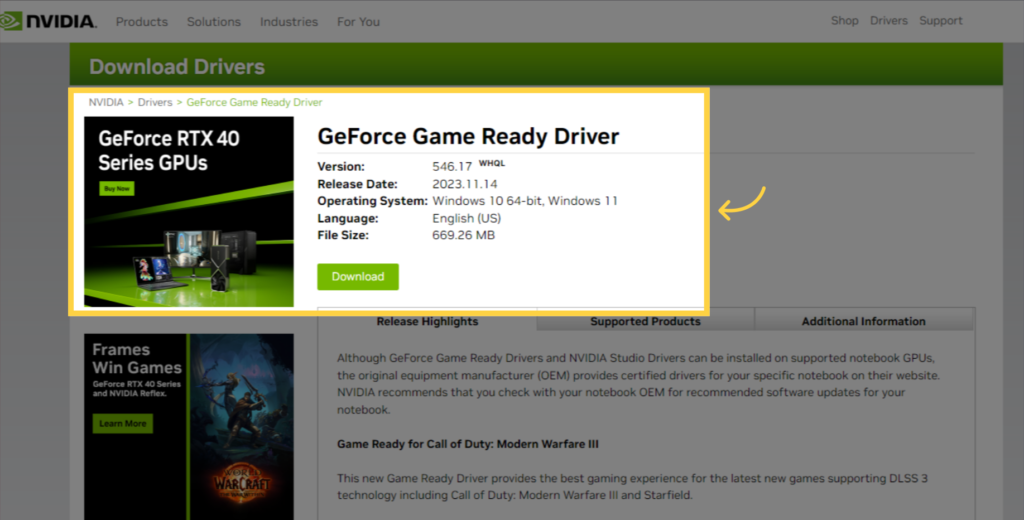
2. Click on the “Download” button for the NVIDIA driver appropriate for your GPU and Windows version.
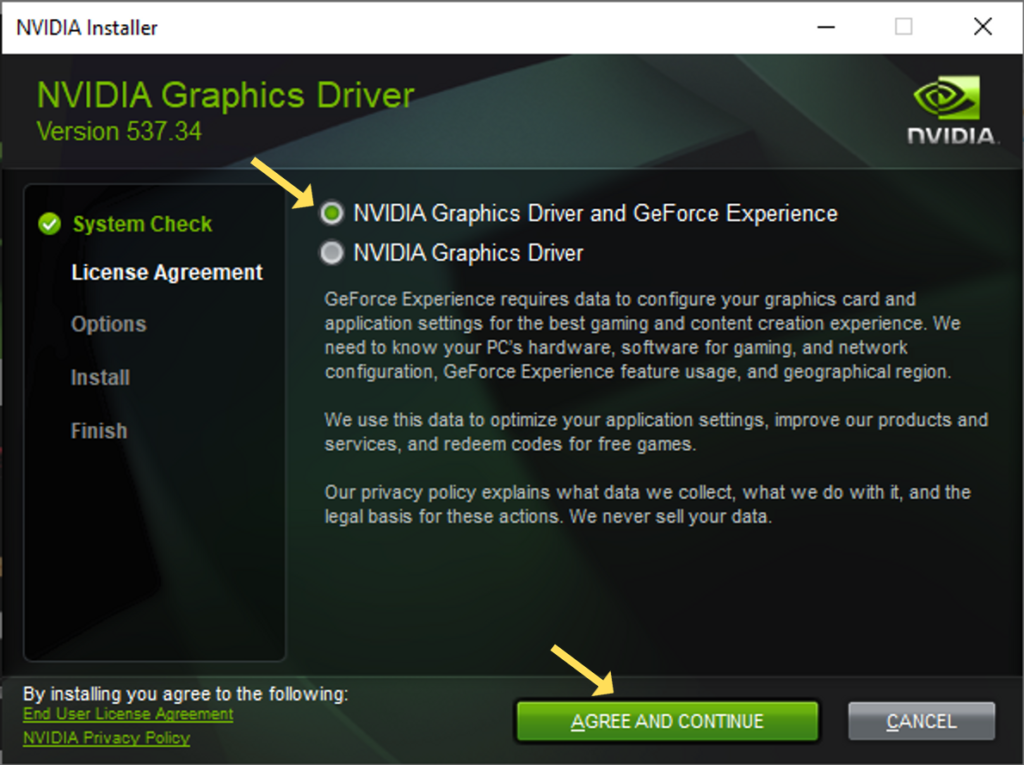
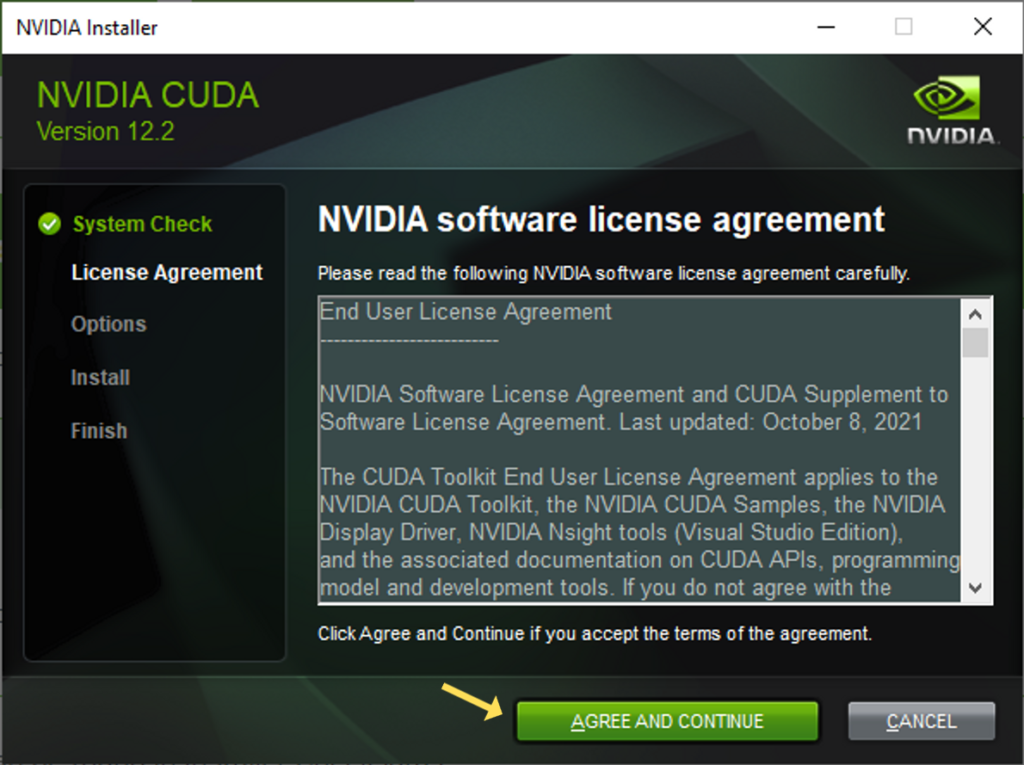
3. Once the download is complete, start the installation, select the first option and click on “Agree and Continue”.
4.Once the installation is done, it’s essential to reboot your computer. Restart your machine to ensure that the new NVIDIA driver is fully integrated into your system.
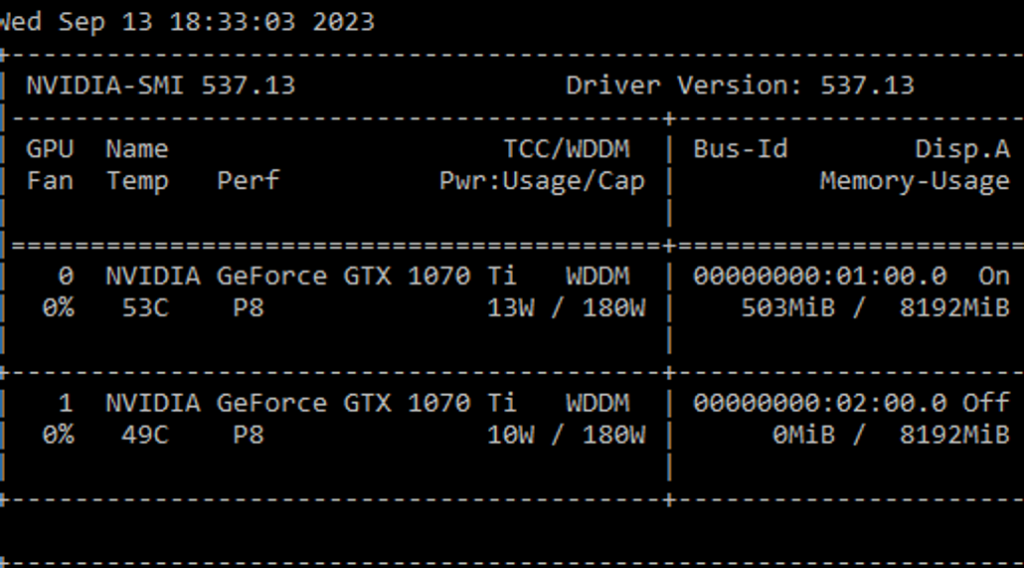
5. After your computer has rebooted, open a Command Prompt (Windows key + R, type cmd) and type the following command
nvidia-smi
6. You should see this outcome
- CUDA Toolkit (Optional)
- Visit the: NVIDIA CUDA Toolkit download page
- Select your operating system (e.g., Windows).
- Choose your architecture (usually x86_64 for 64-bit Windows).
- Download the exe local Installer. After downloading the file, run the installer
5. And follow the installation process.
6. Then, verify the installation process. Open a Command Prompt (Windows key + R, type cmd) and type the following command
nvcc --version

Mac
- Visit docker.io , download Docker Desktop, and install it (*select M1 chip)
- Connect your GPU: Follow the detailed instructions provided by io.net to ensure your GPU is correctly configured and connected to the network.
Windows
Go to cloud.io.net
If you have not yet created an account, Creating an account on io.net is currently available only through Google or Twitter. Simply click on the “Sign Up” button and select either Google or Twitter to proceed with account creation.
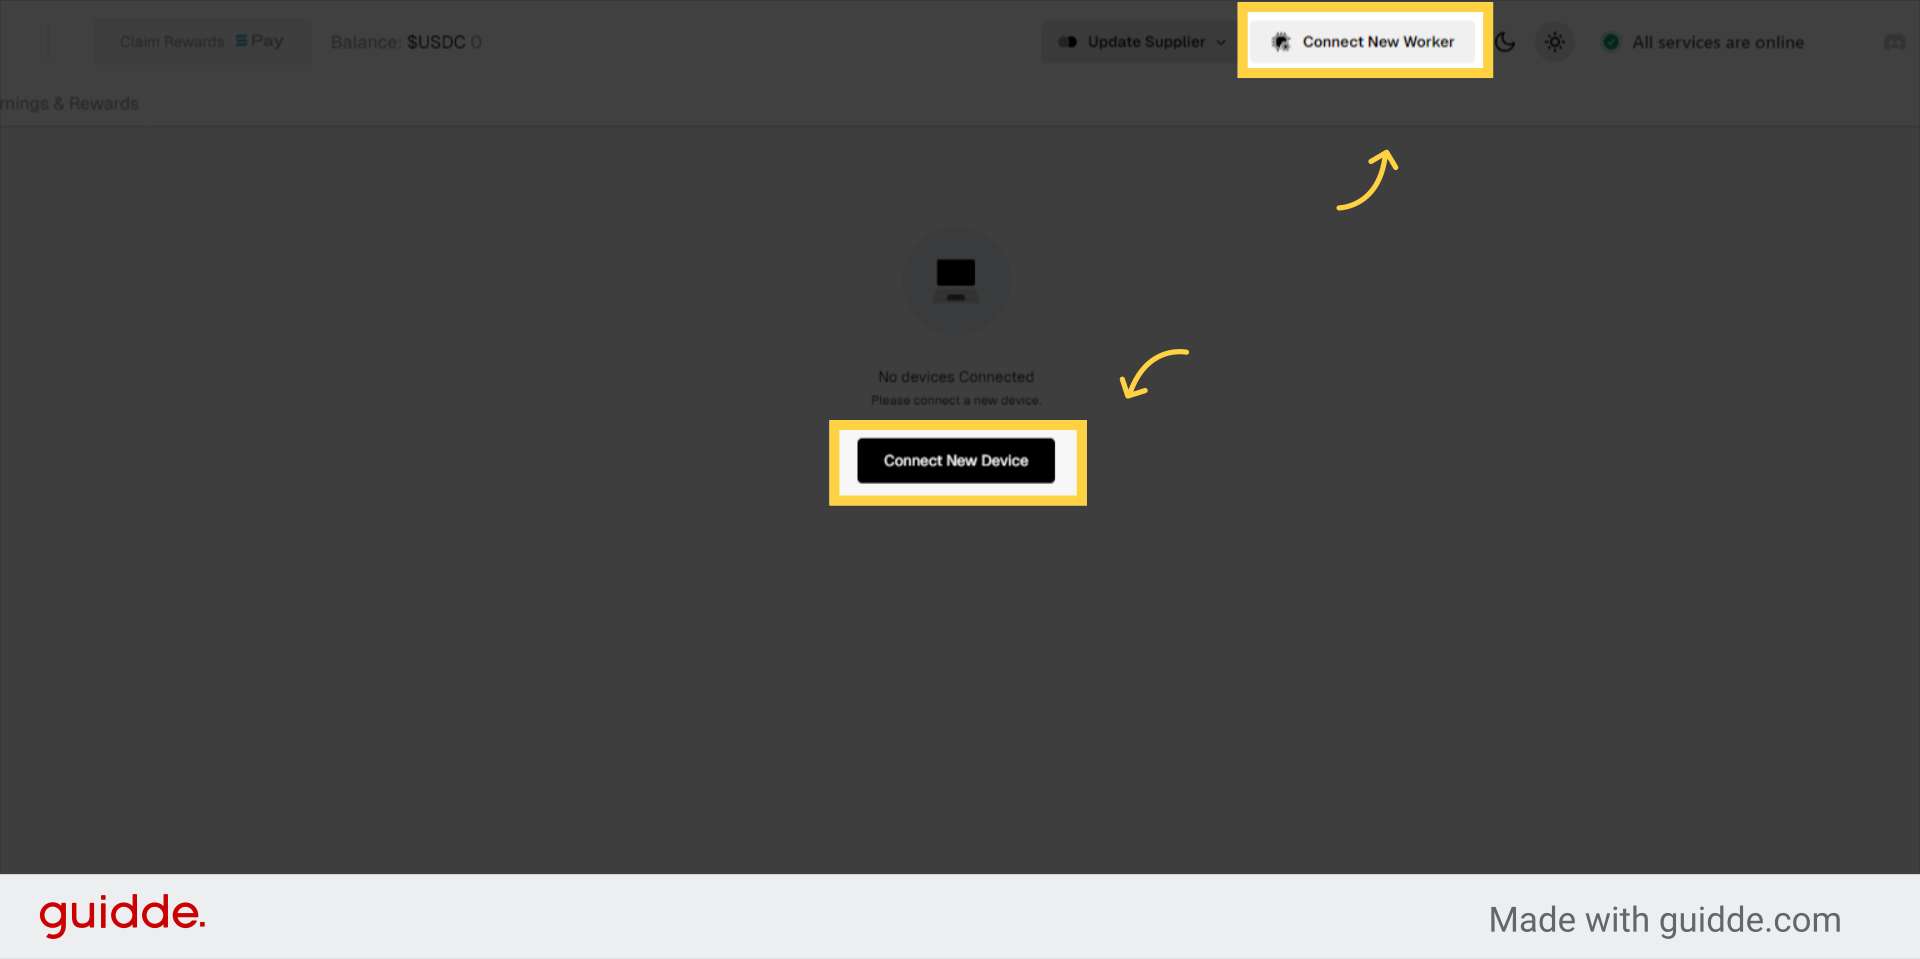
1. From Dropdown Navigate to worker
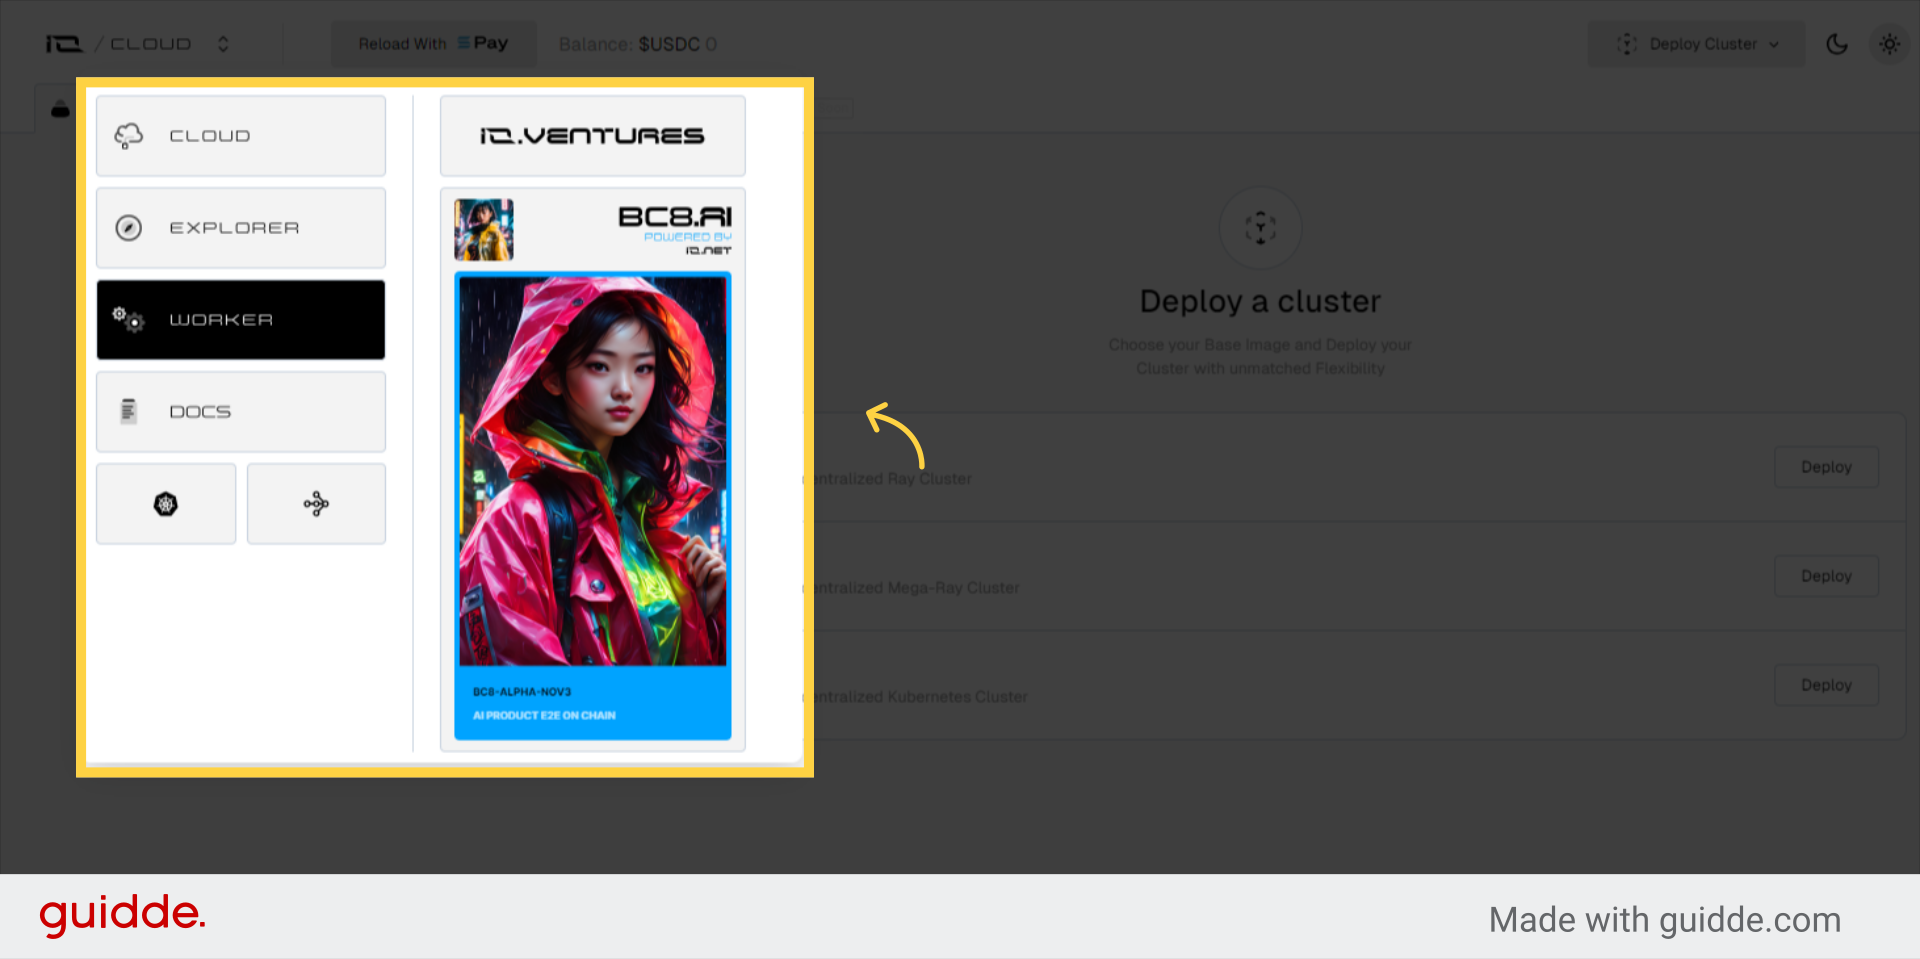
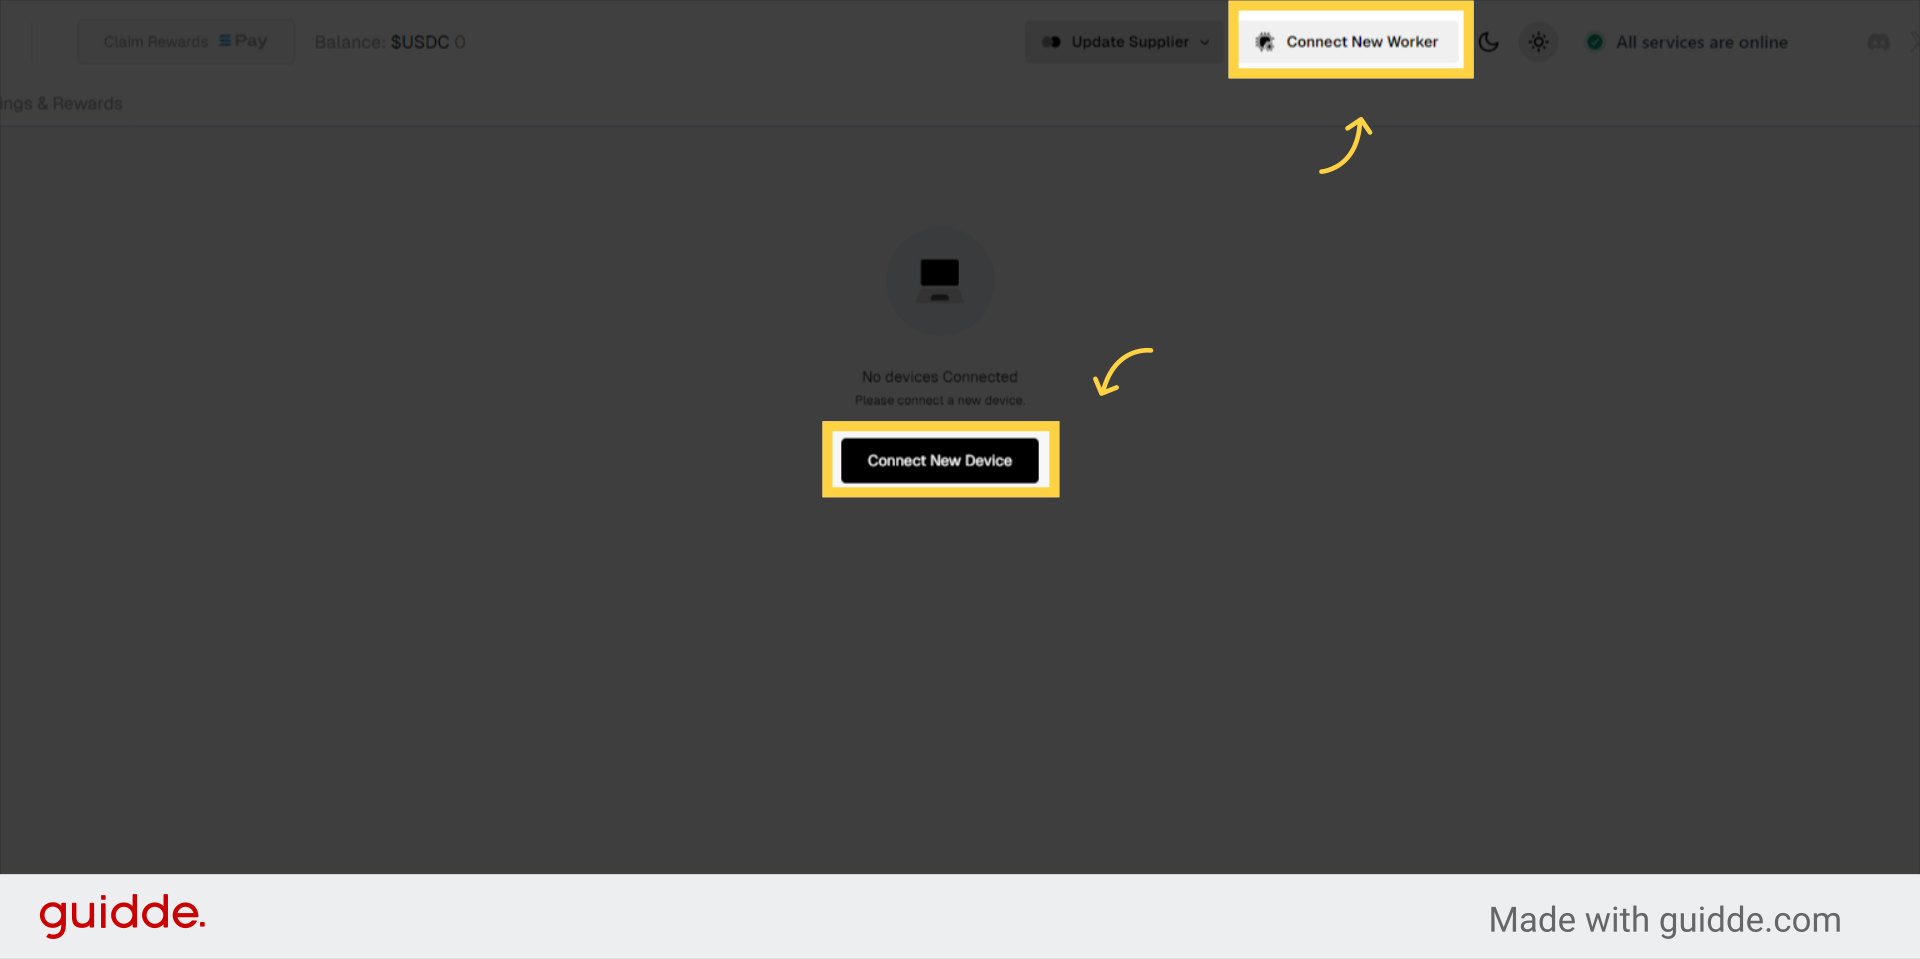
2. Connect New Worker
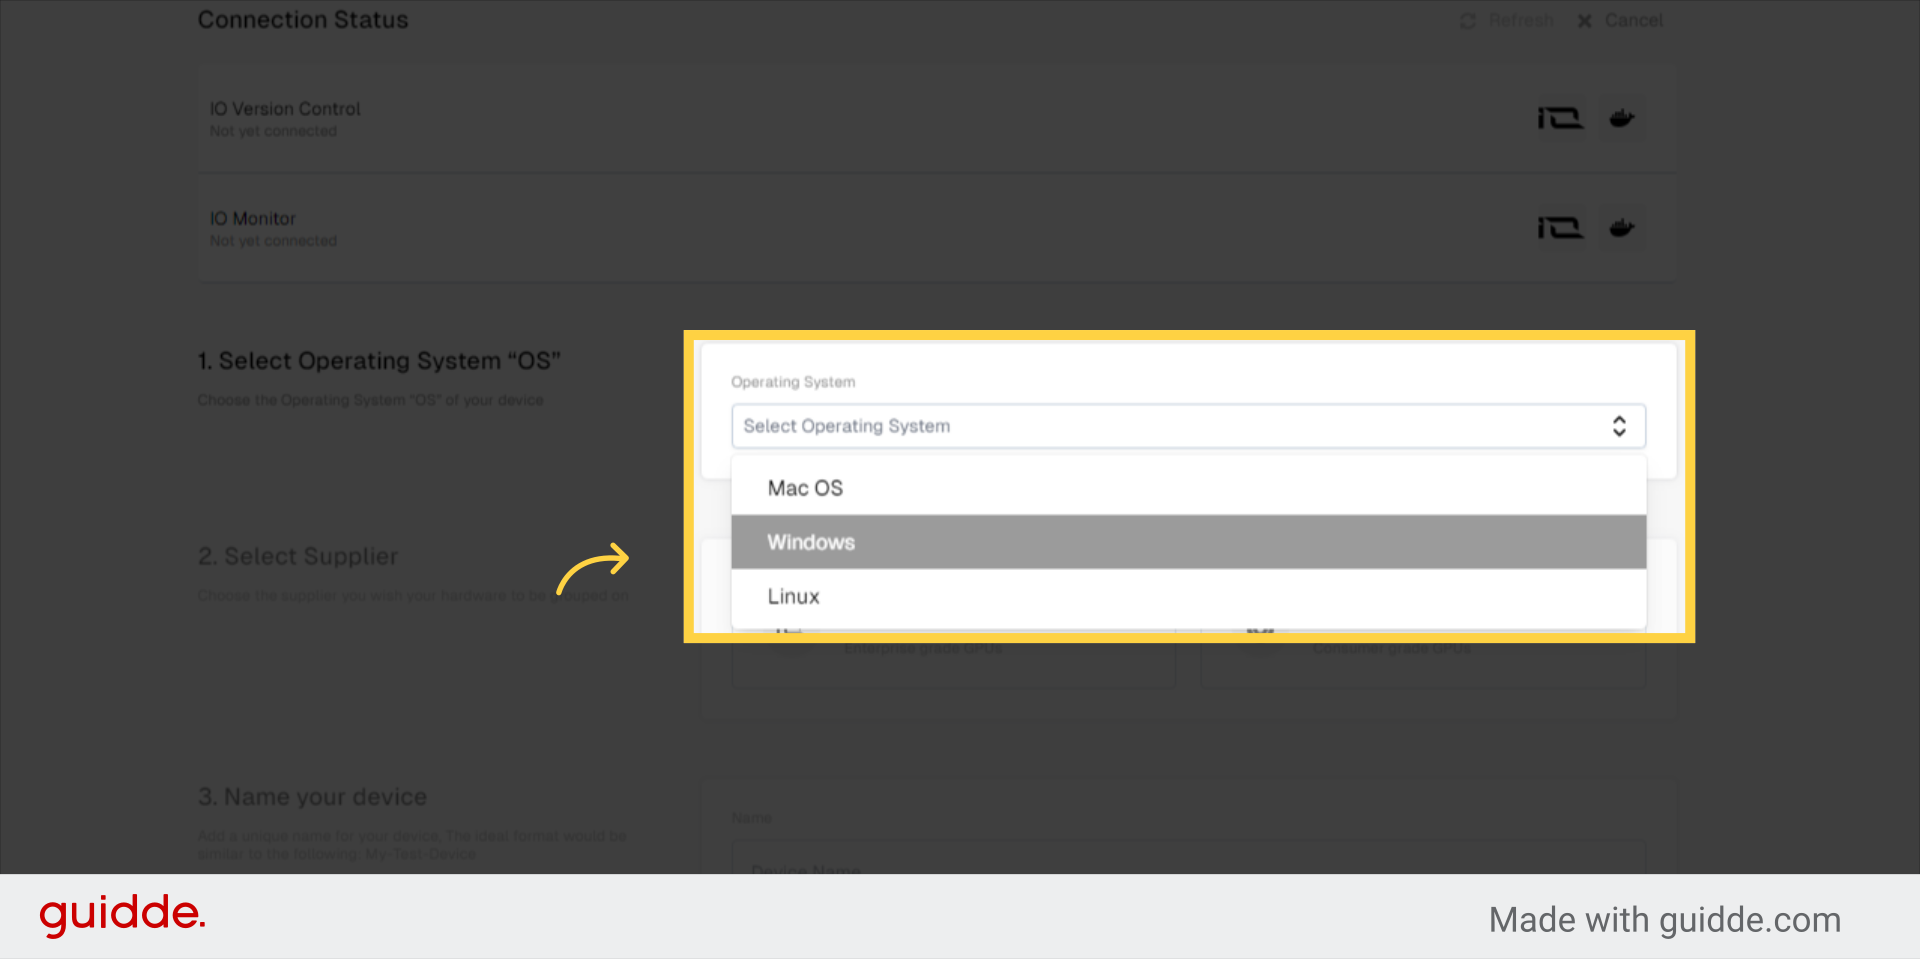
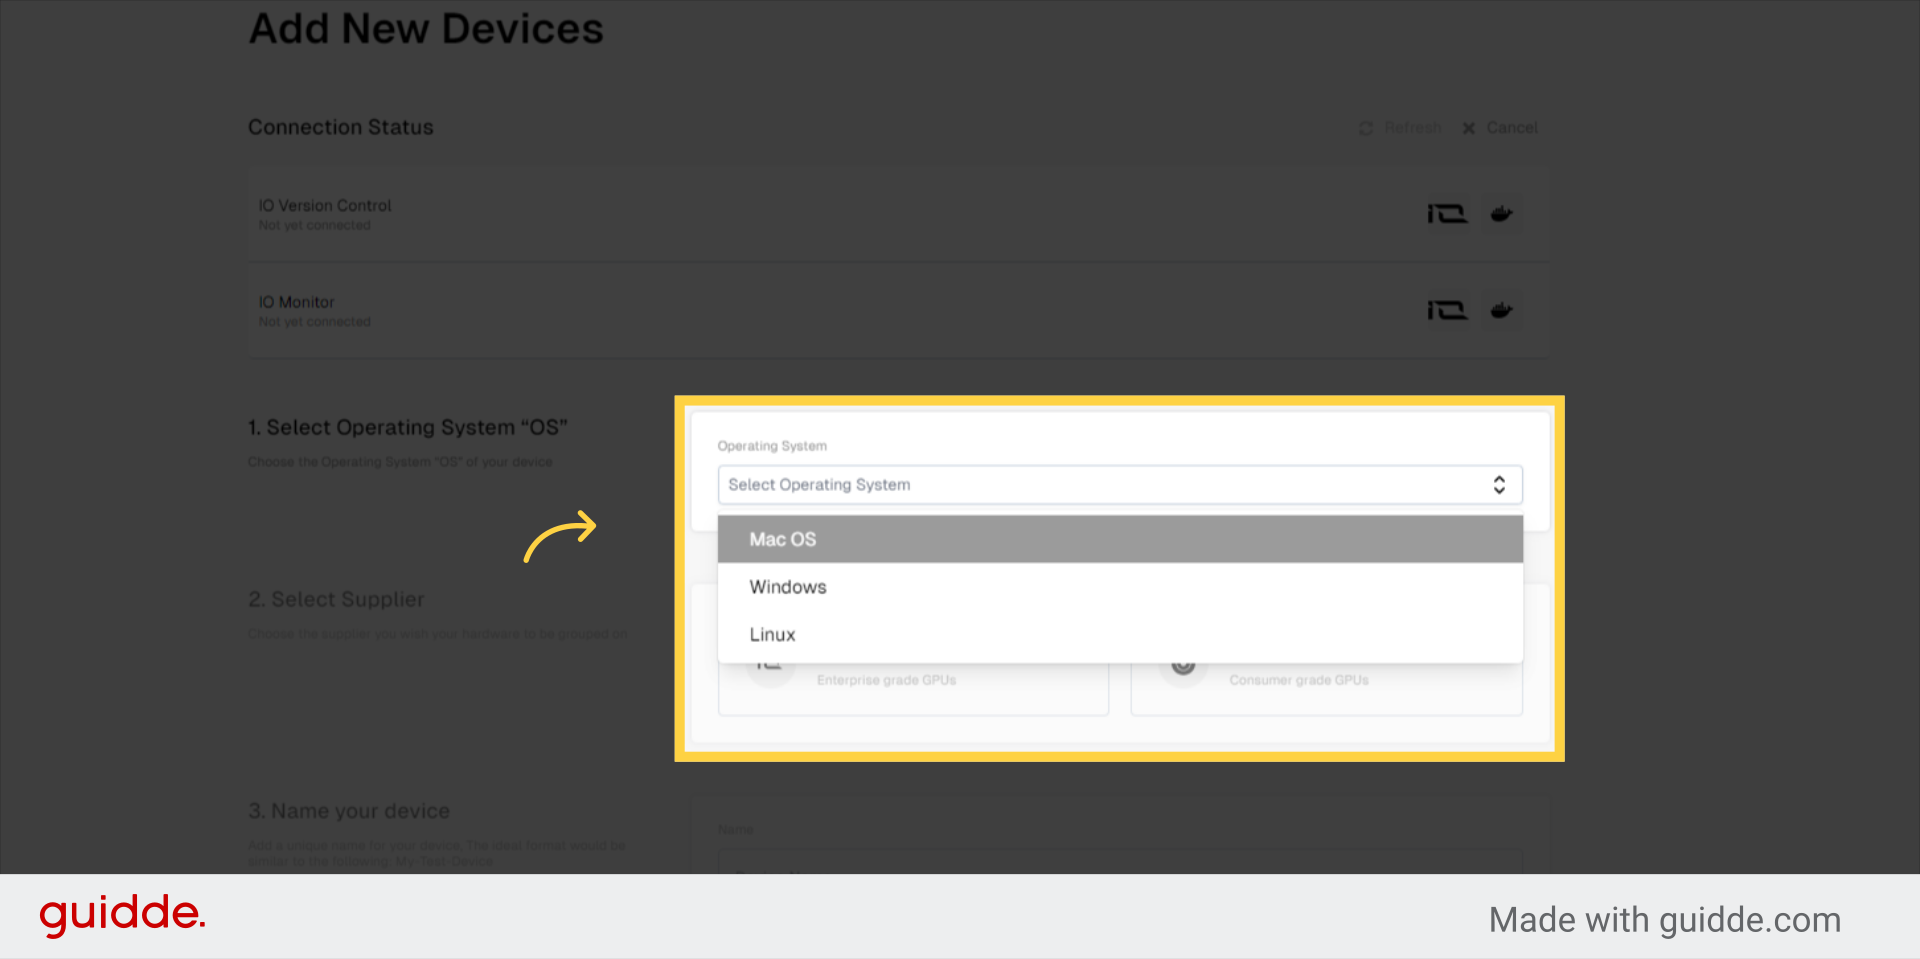
3. Select Operating System “OS”
Choose the Operating System “OS” of your device
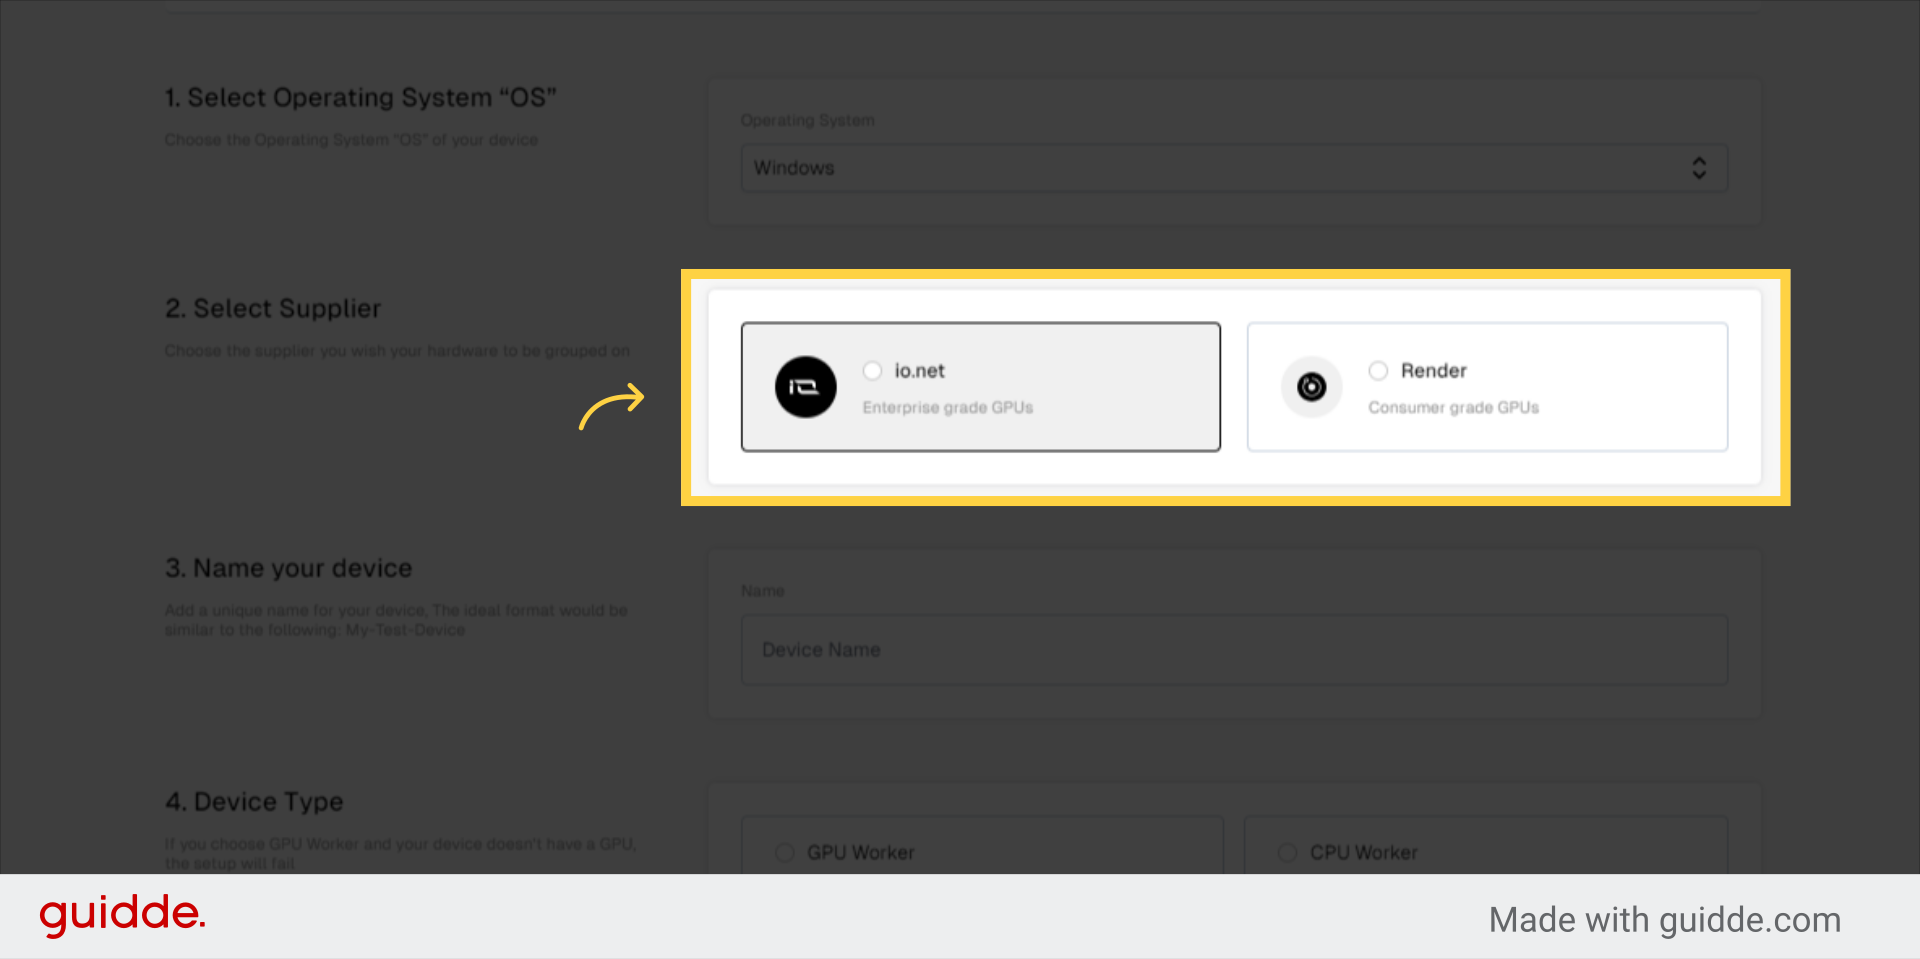
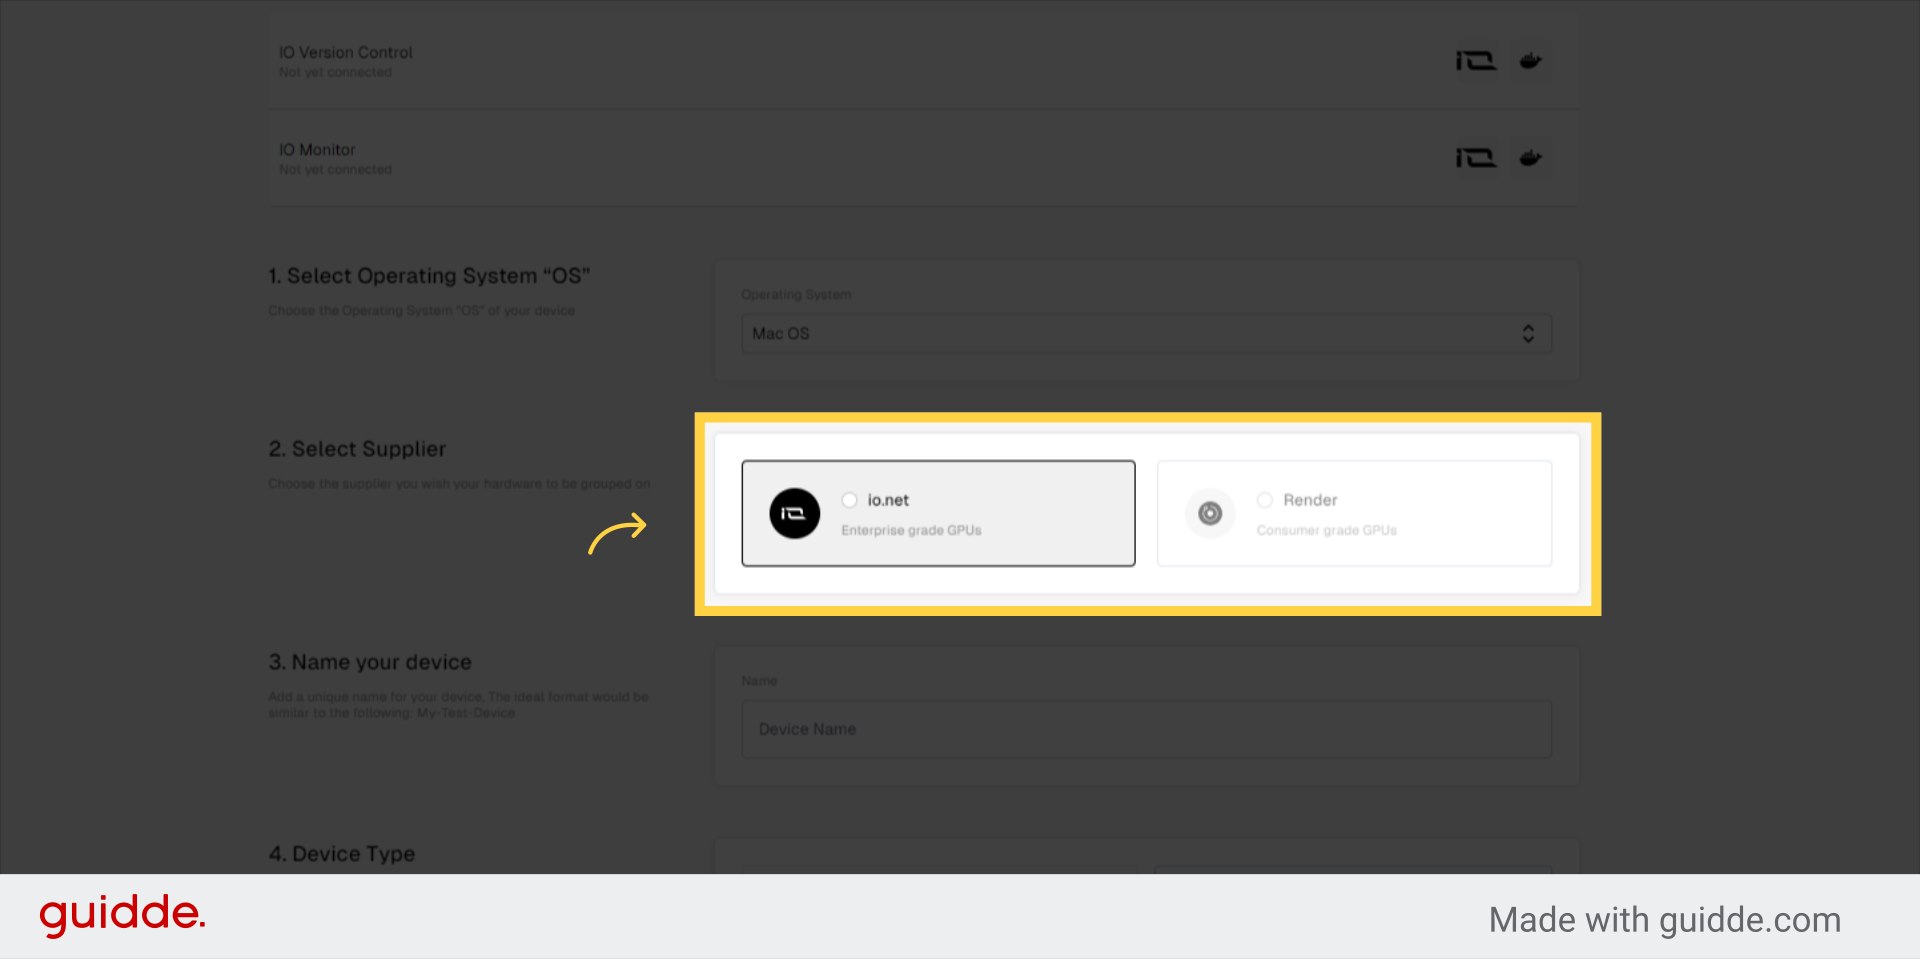
4. Select Supplier
Choose the supplier you wish your hardware to be grouped on
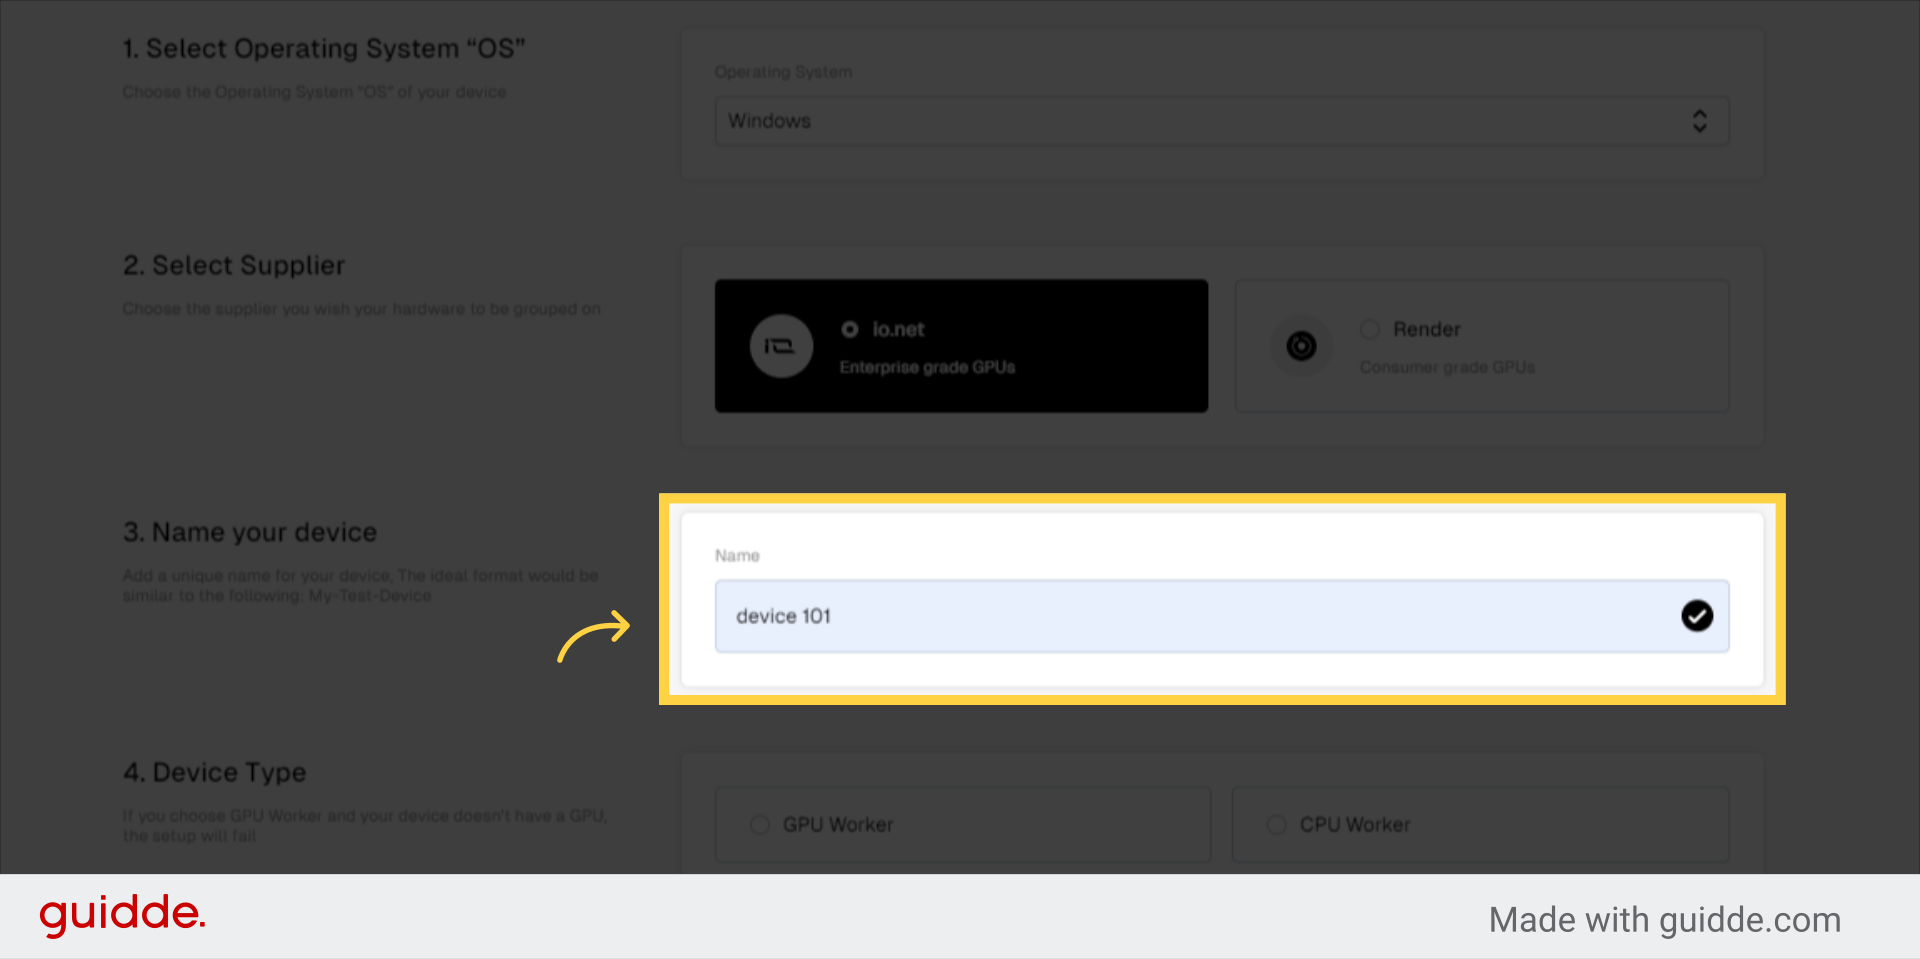
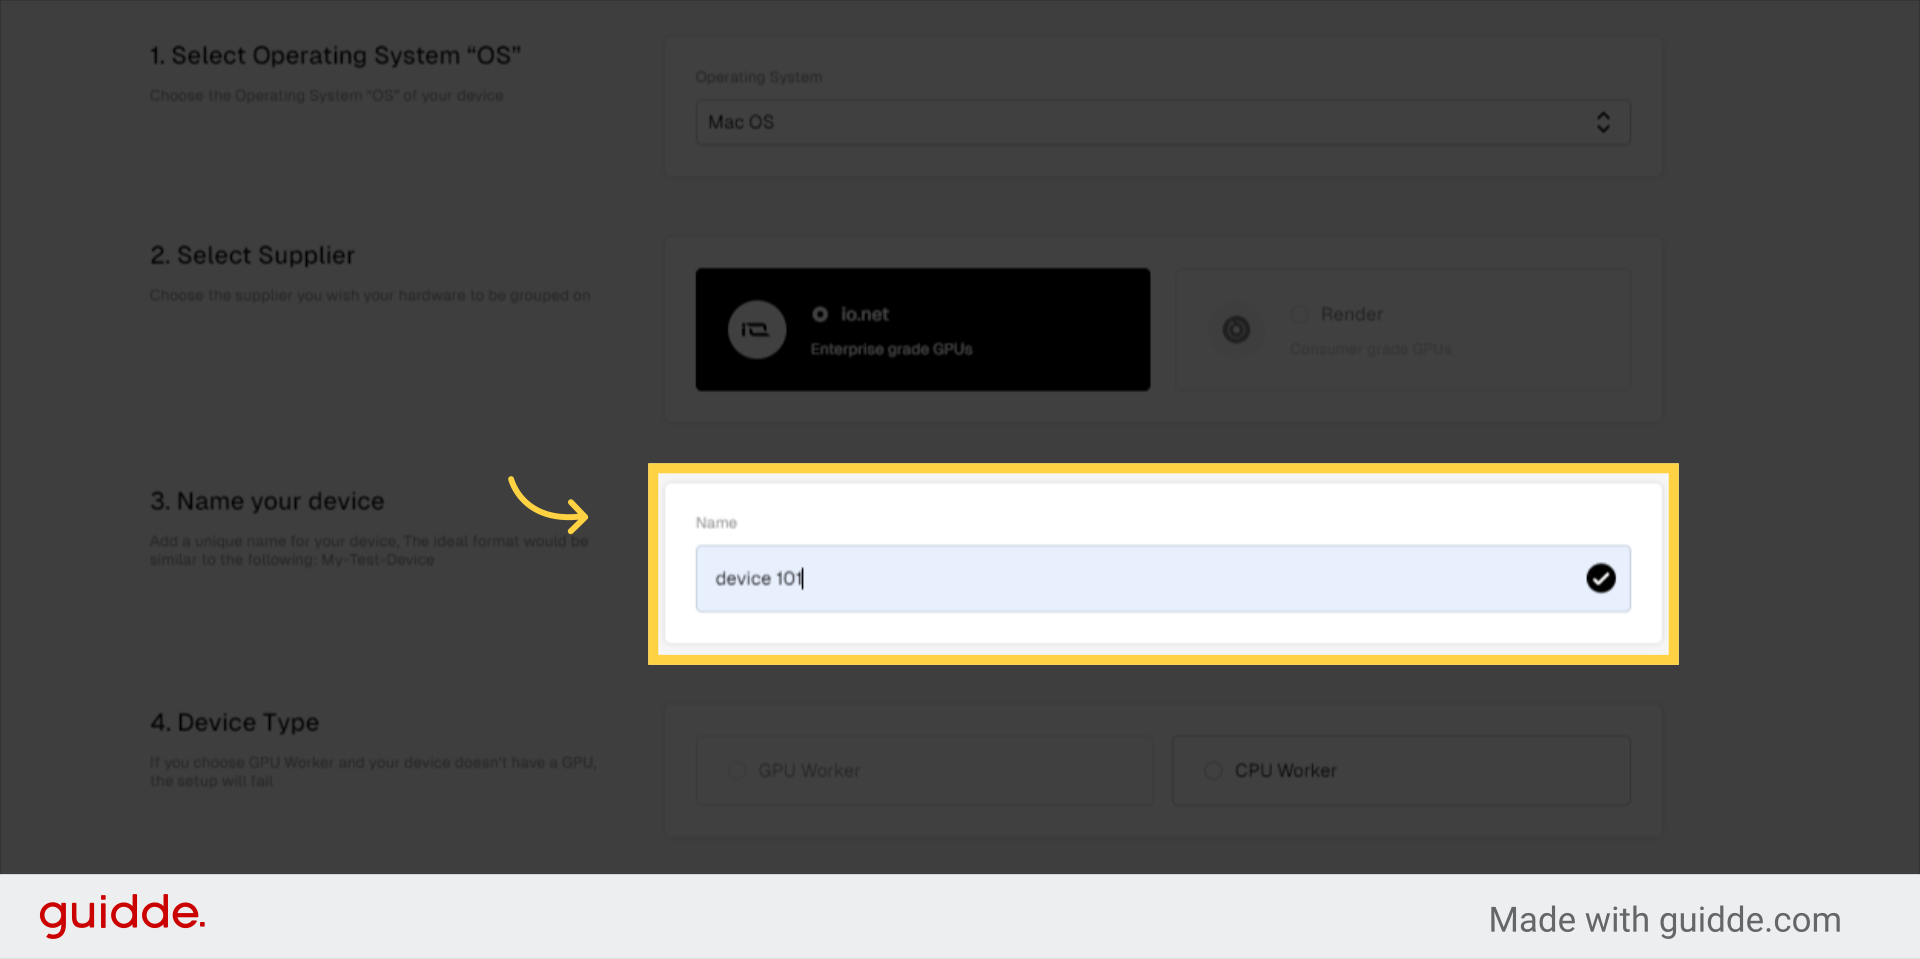
5. Name your device
Add a unique name for your device, The ideal format would be similar to the following: My-Test-Device
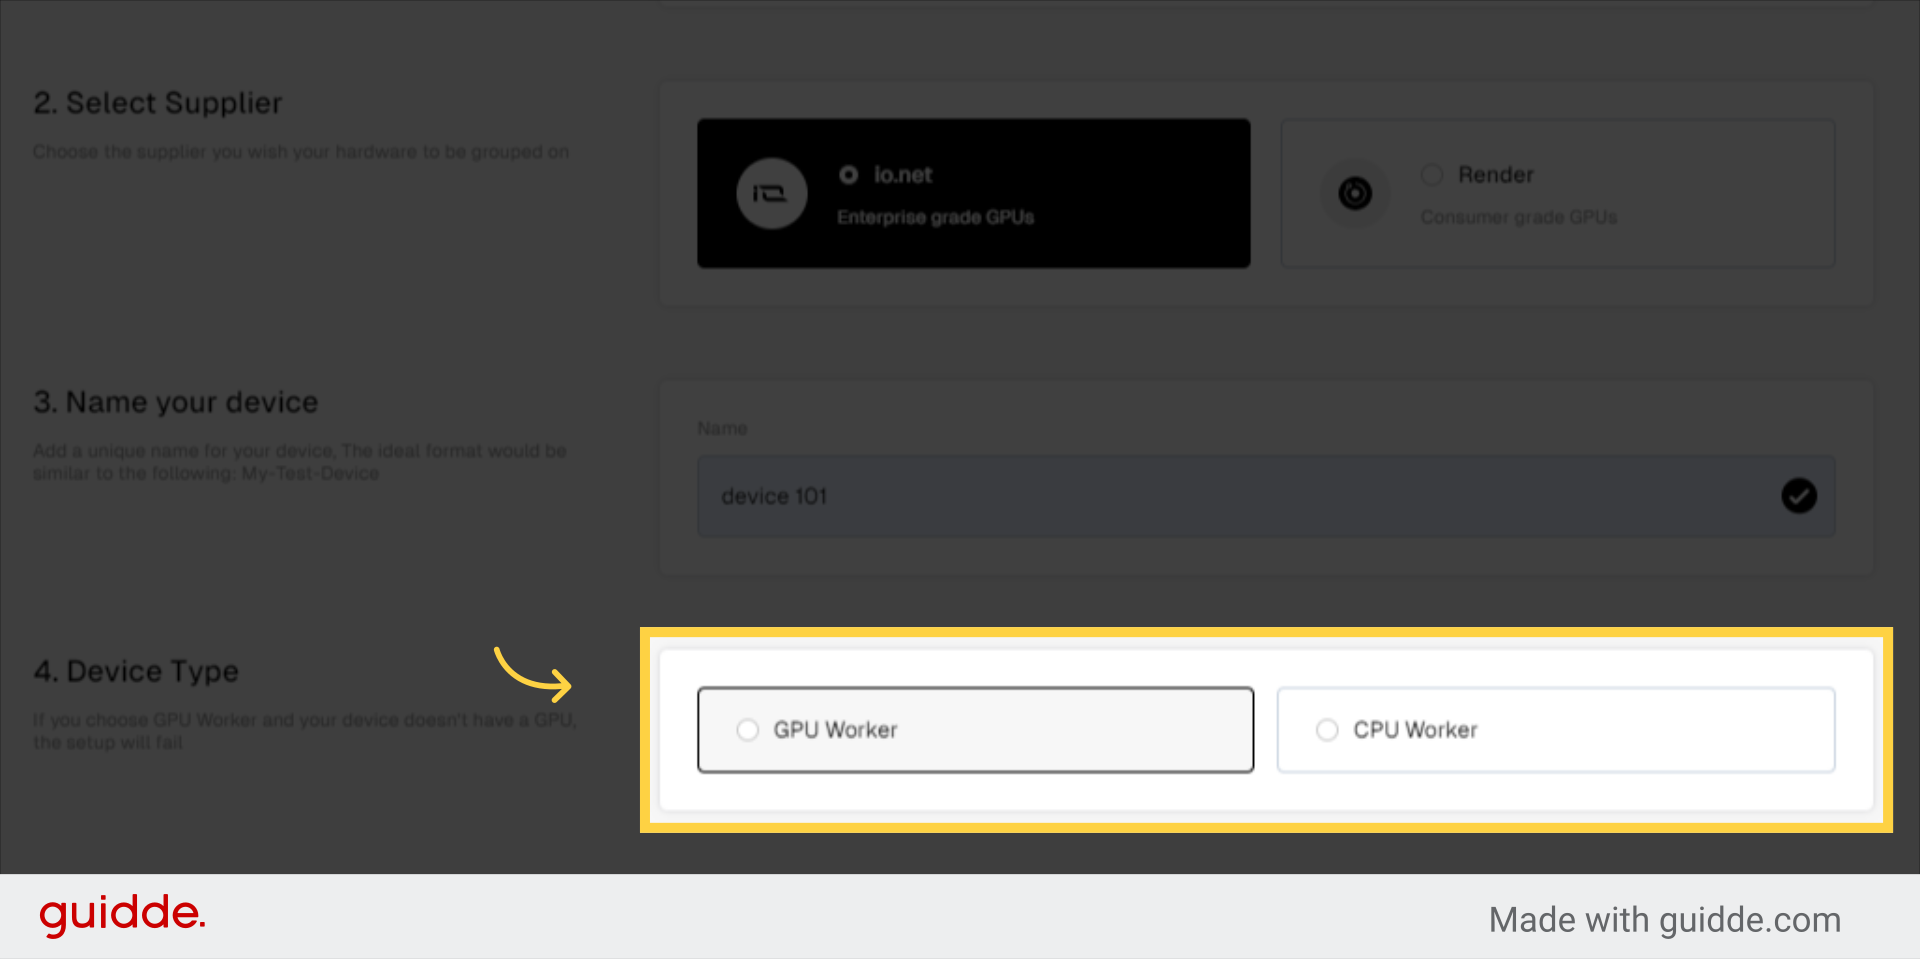
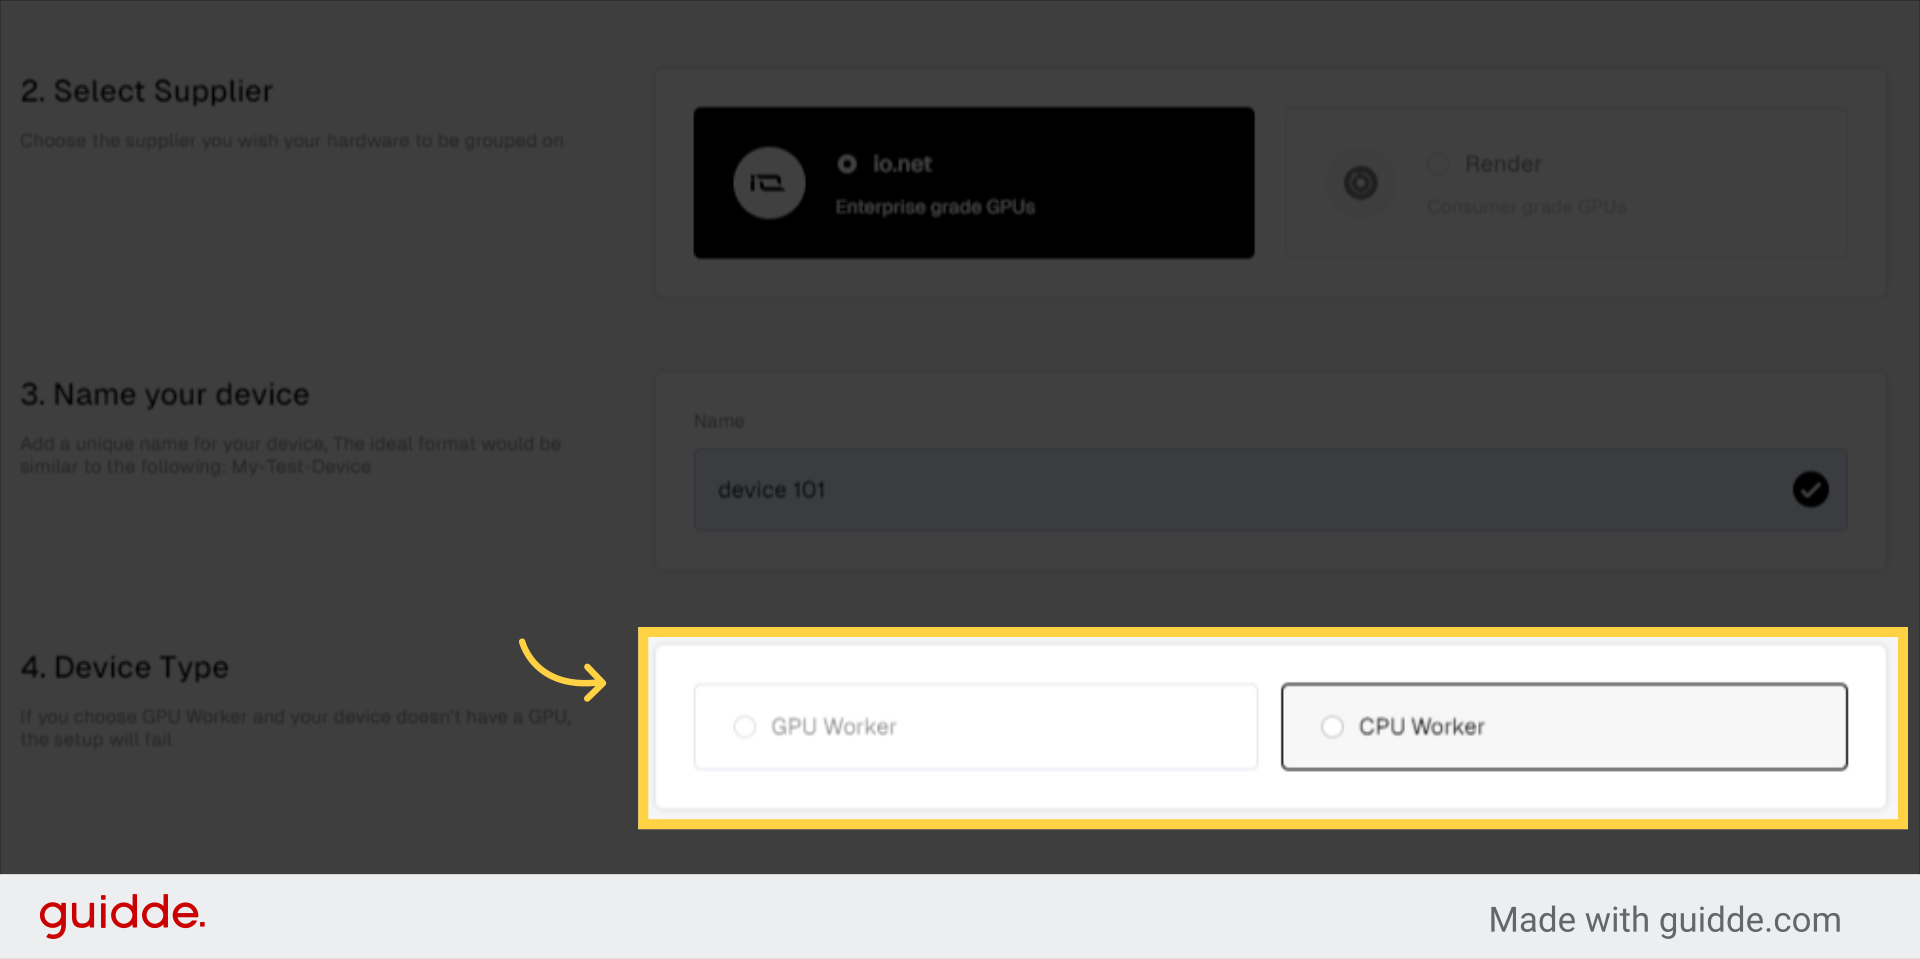
6. Device Type
If you choose GPU Worker and your device doesn’t have a GPU, the setup will fail
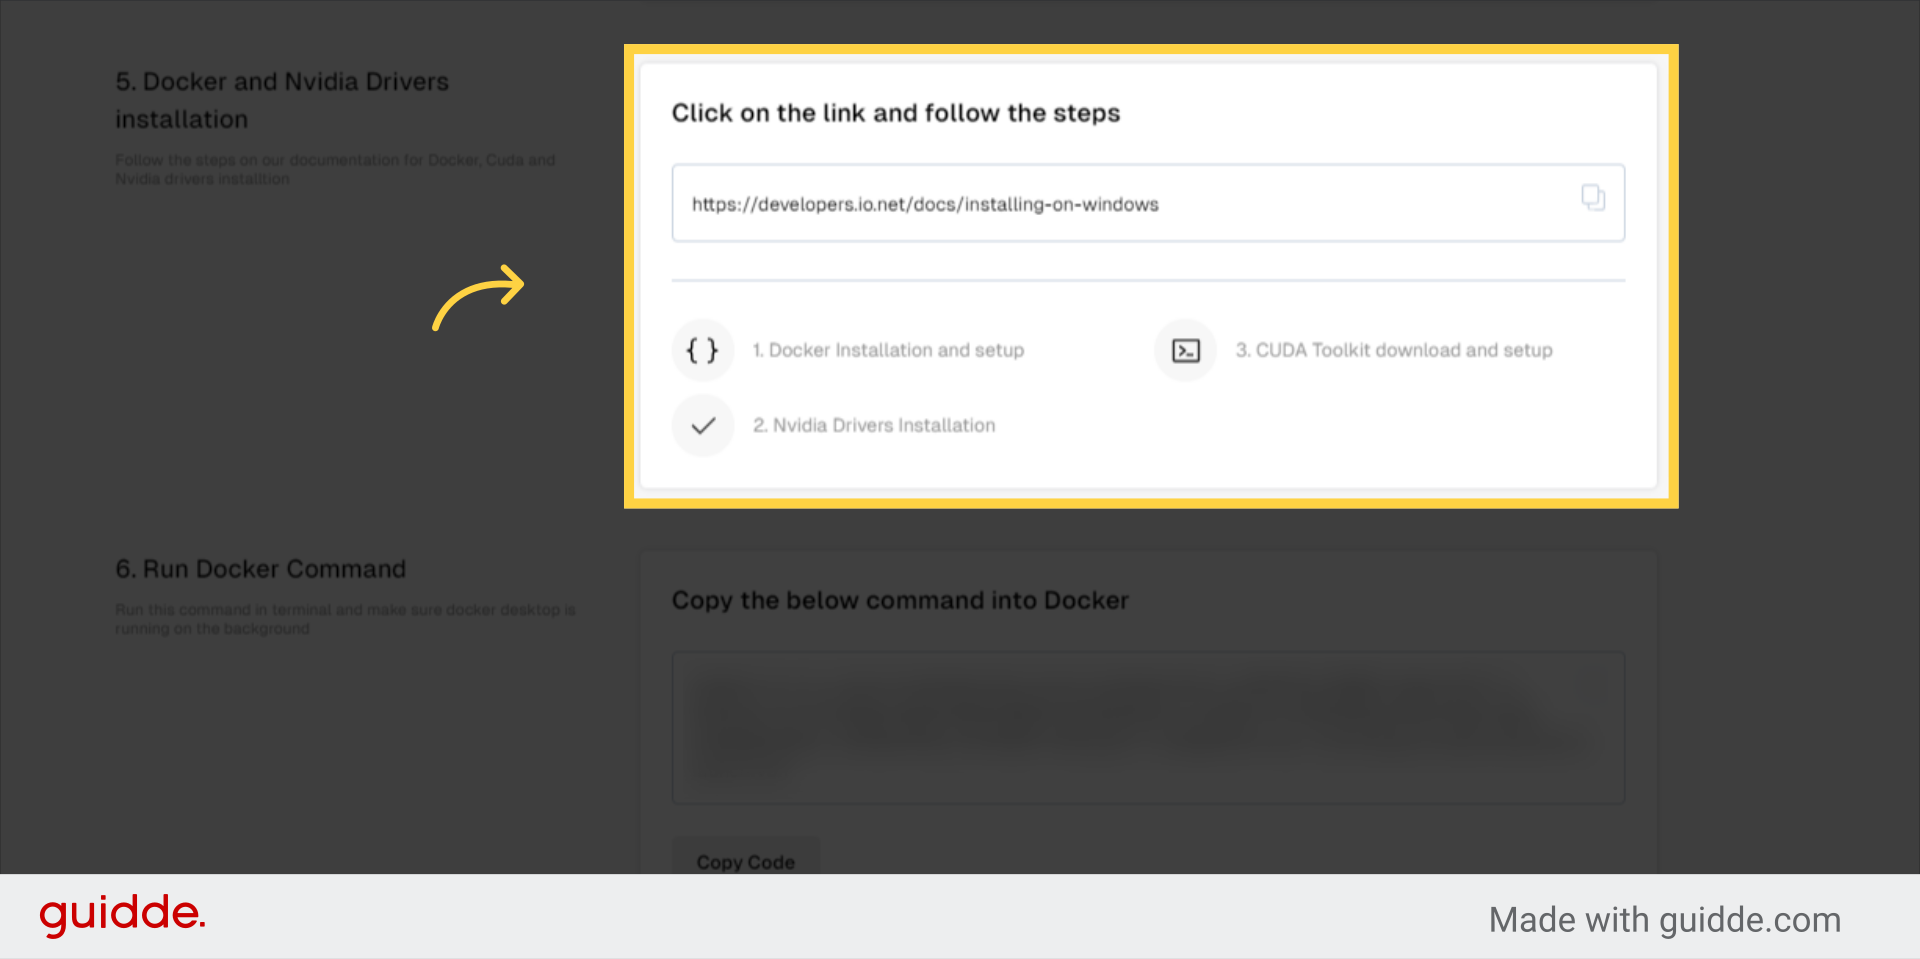
7. copy the link and follow the steps
Follow the steps on our documentation for Docker, Cuda and Nvidia drivers installtion
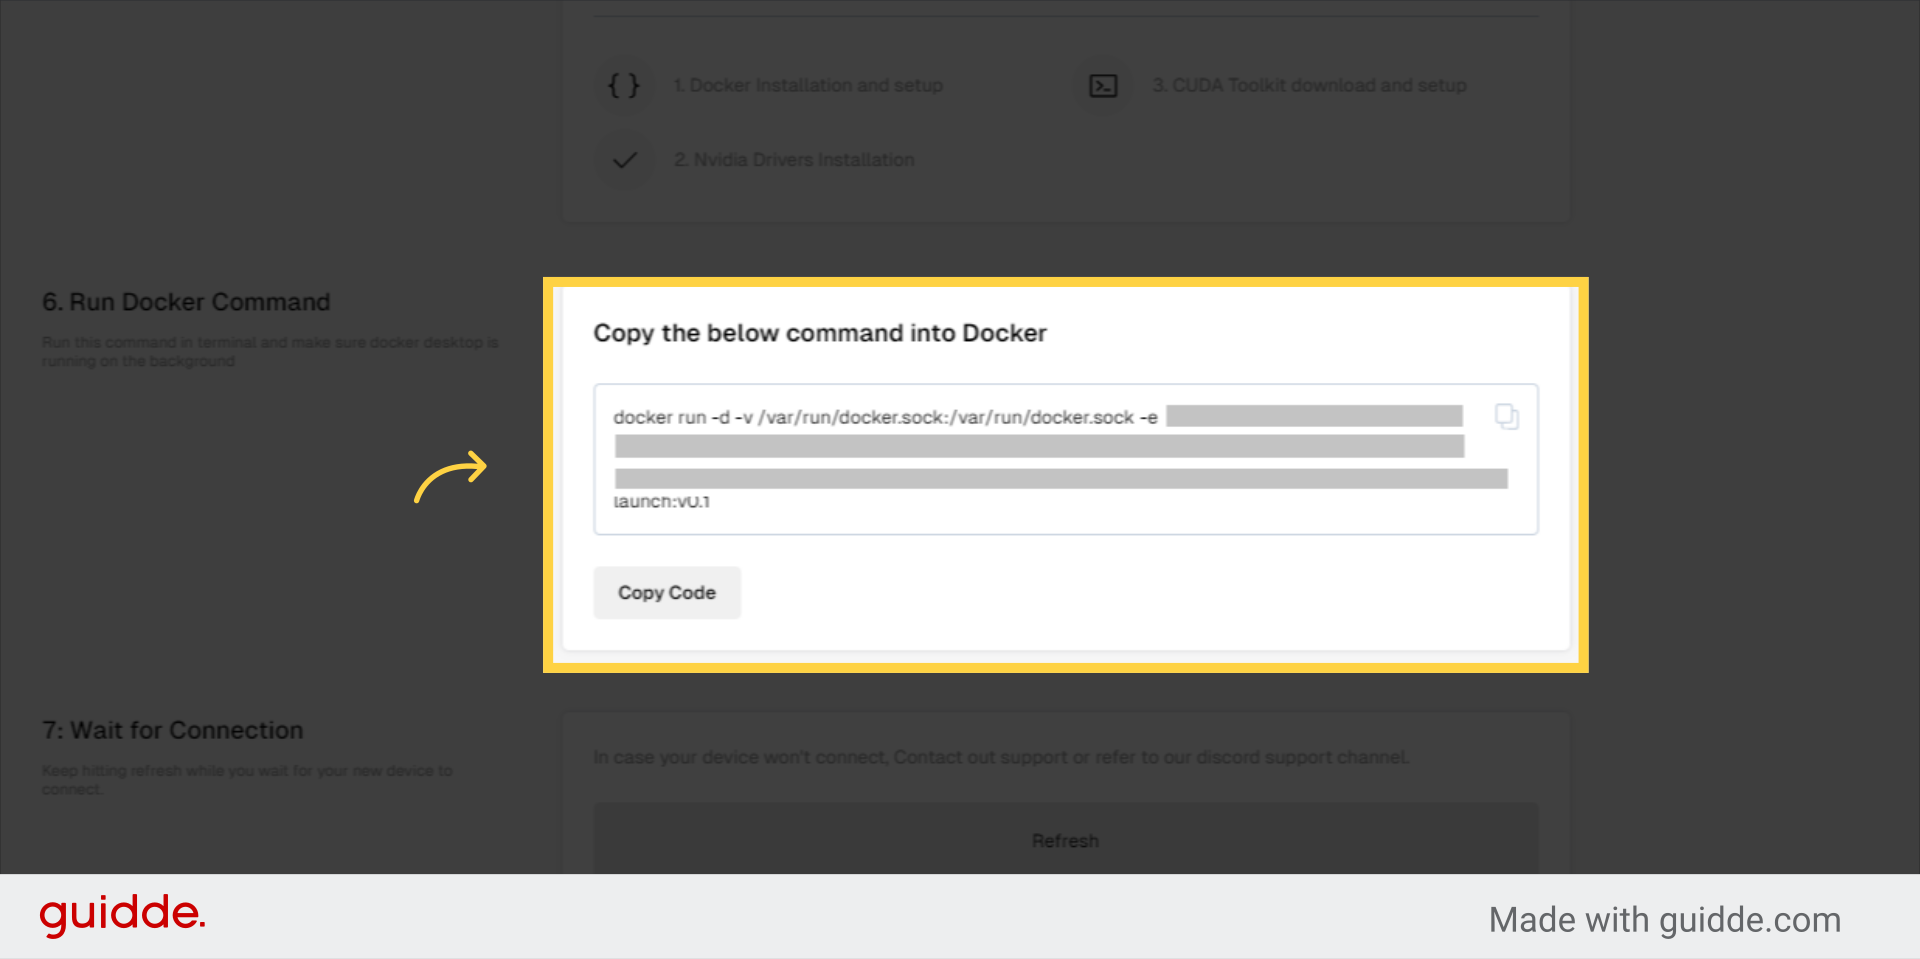
8. Copy the command into Docker and run it
Run this command in terminal and make sure docker desktop is running on the background
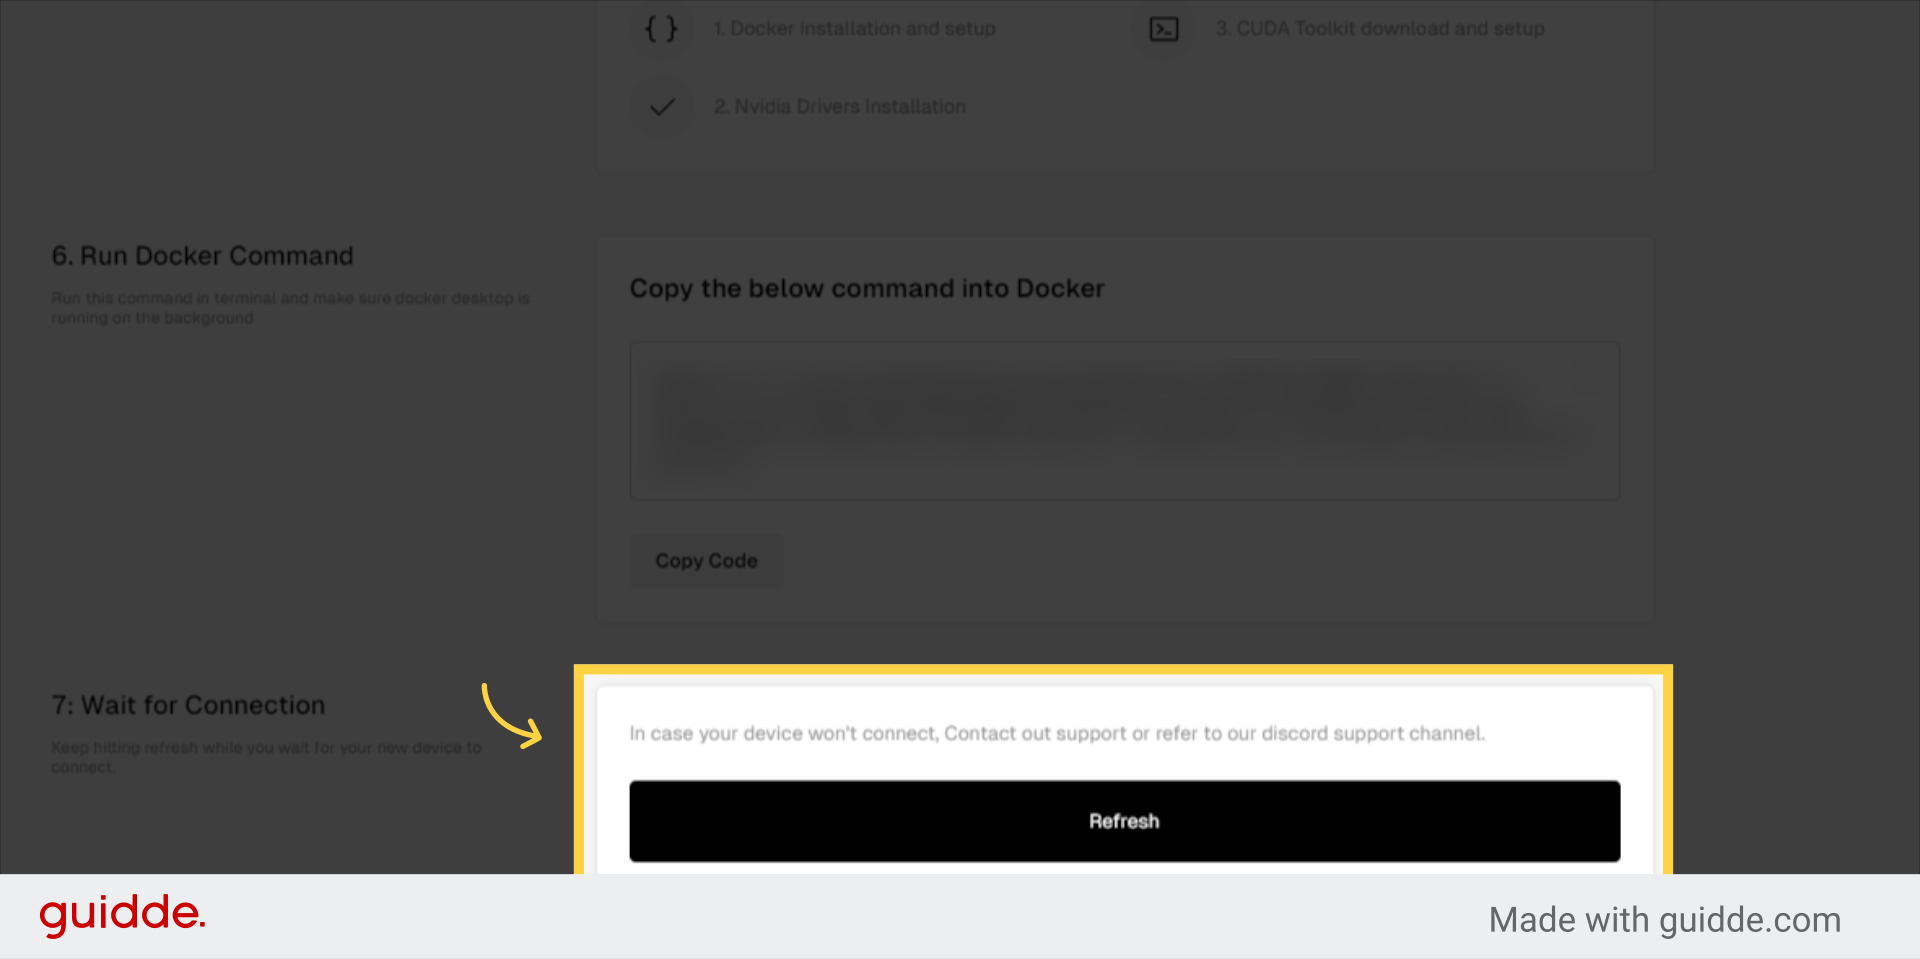
9. Wait for Connection
Keep hitting refresh while you wait for your new device to connect.
Mac
Go to cloud.io.net
If you have not yet created an account, Creating an account on io.net is currently available only through Google or Twitter. Simply click on the “Sign Up” button and select either Google or Twitter to proceed with account creation.
1. From Dropdown Navigate to worker

2. Connect New Worker
3. Select Operating System “OS”
Choose the Operating System “OS” of your device
4. Select Supplier
Choose the supplier you wish your hardware to be grouped on
5. Name your device
Add a unique name for your device, The ideal format would be similar to the following: My-Test-Device
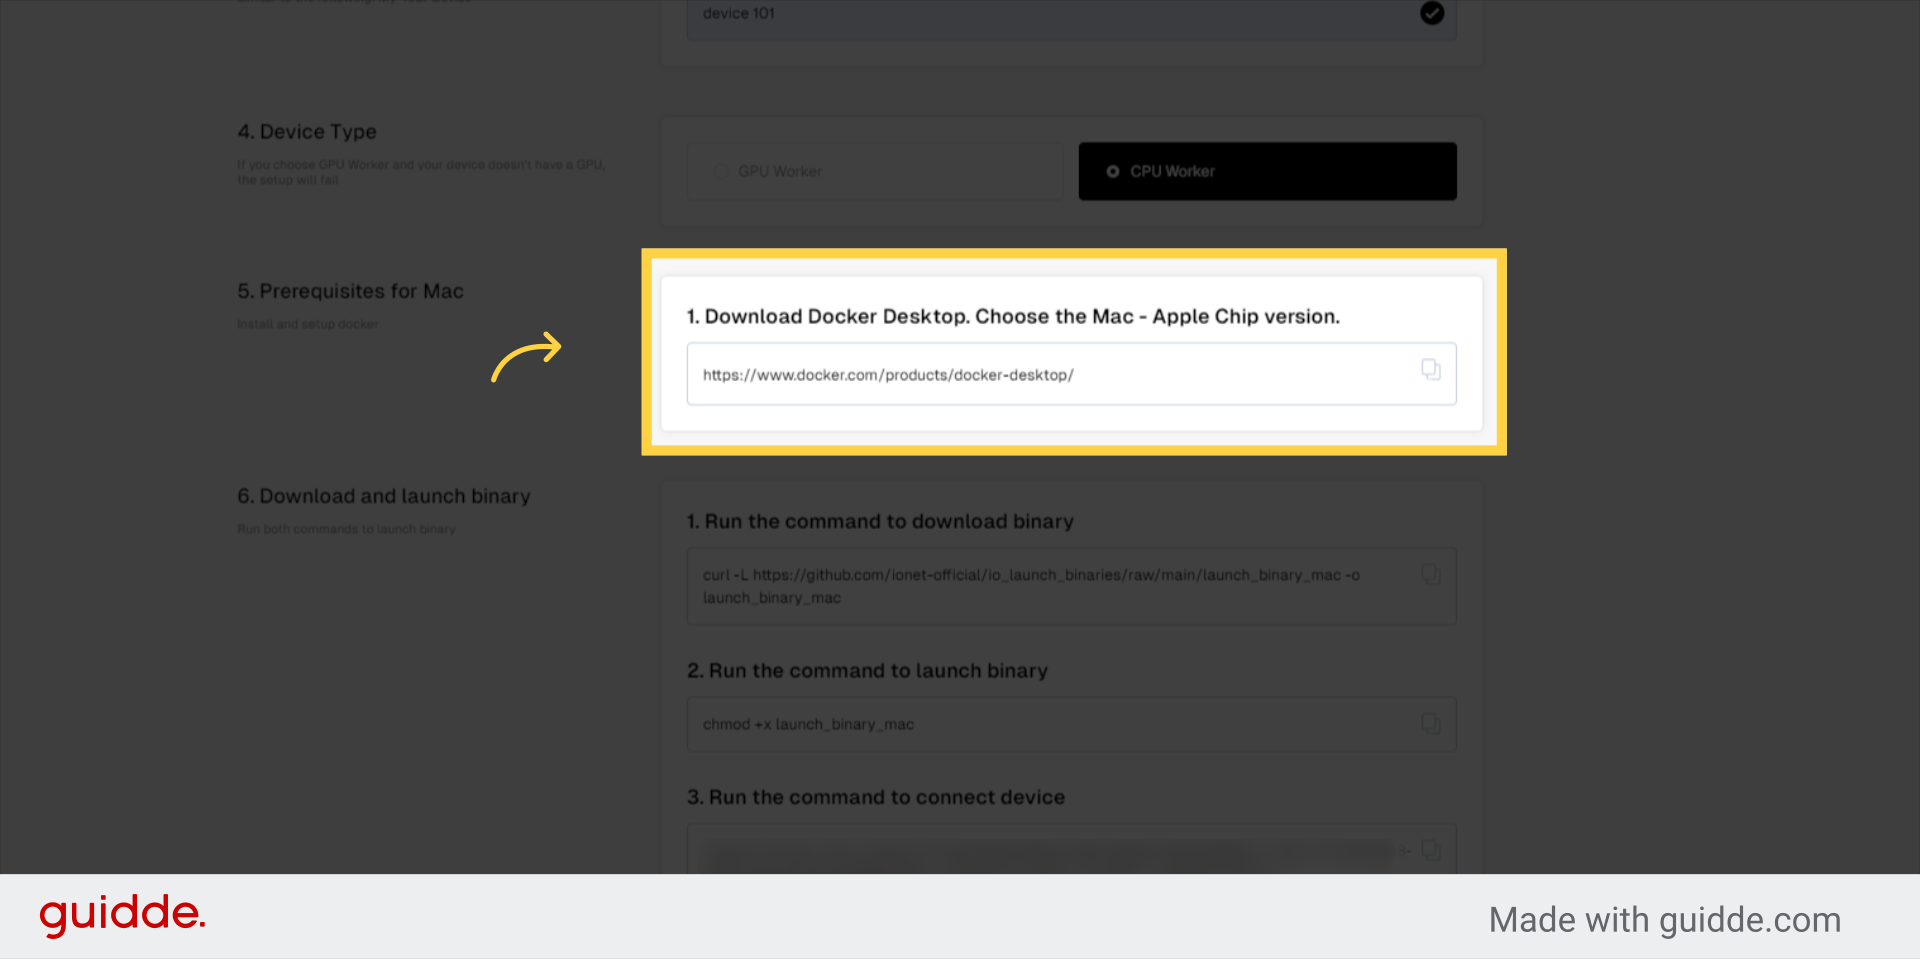
6. Device Type
If you choose GPU Worker and your device doesn’t have a GPU, the setup will fail
7. Prerequisites for Mac
Download Docker Desktop. Choose the Mac – Apple Chip version.
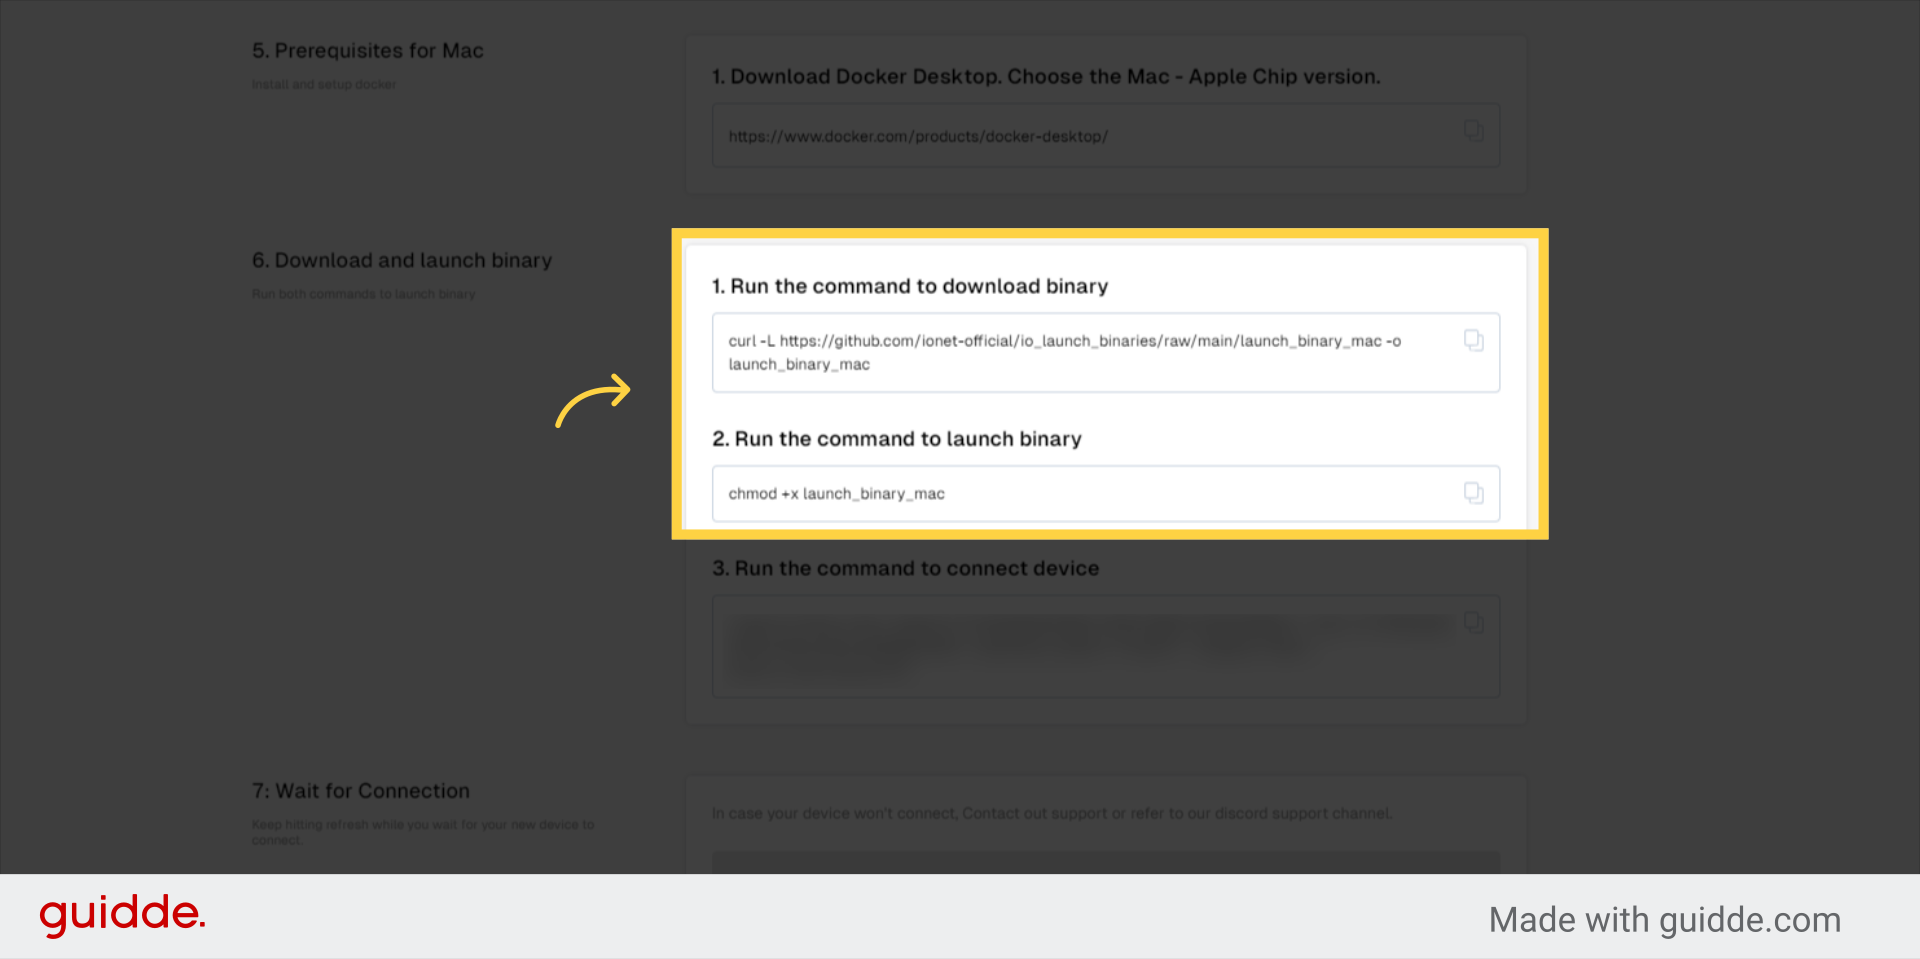
8. Download and launch binary
Run both commands to launch binaryRun the command to download binary
curl -L https://github.com/ionet-official/io_launch_binaries/raw/main/launch_binary_mac -o launch_binary_mac
Run the command to launch binary
chmod +x launch_binary_mac
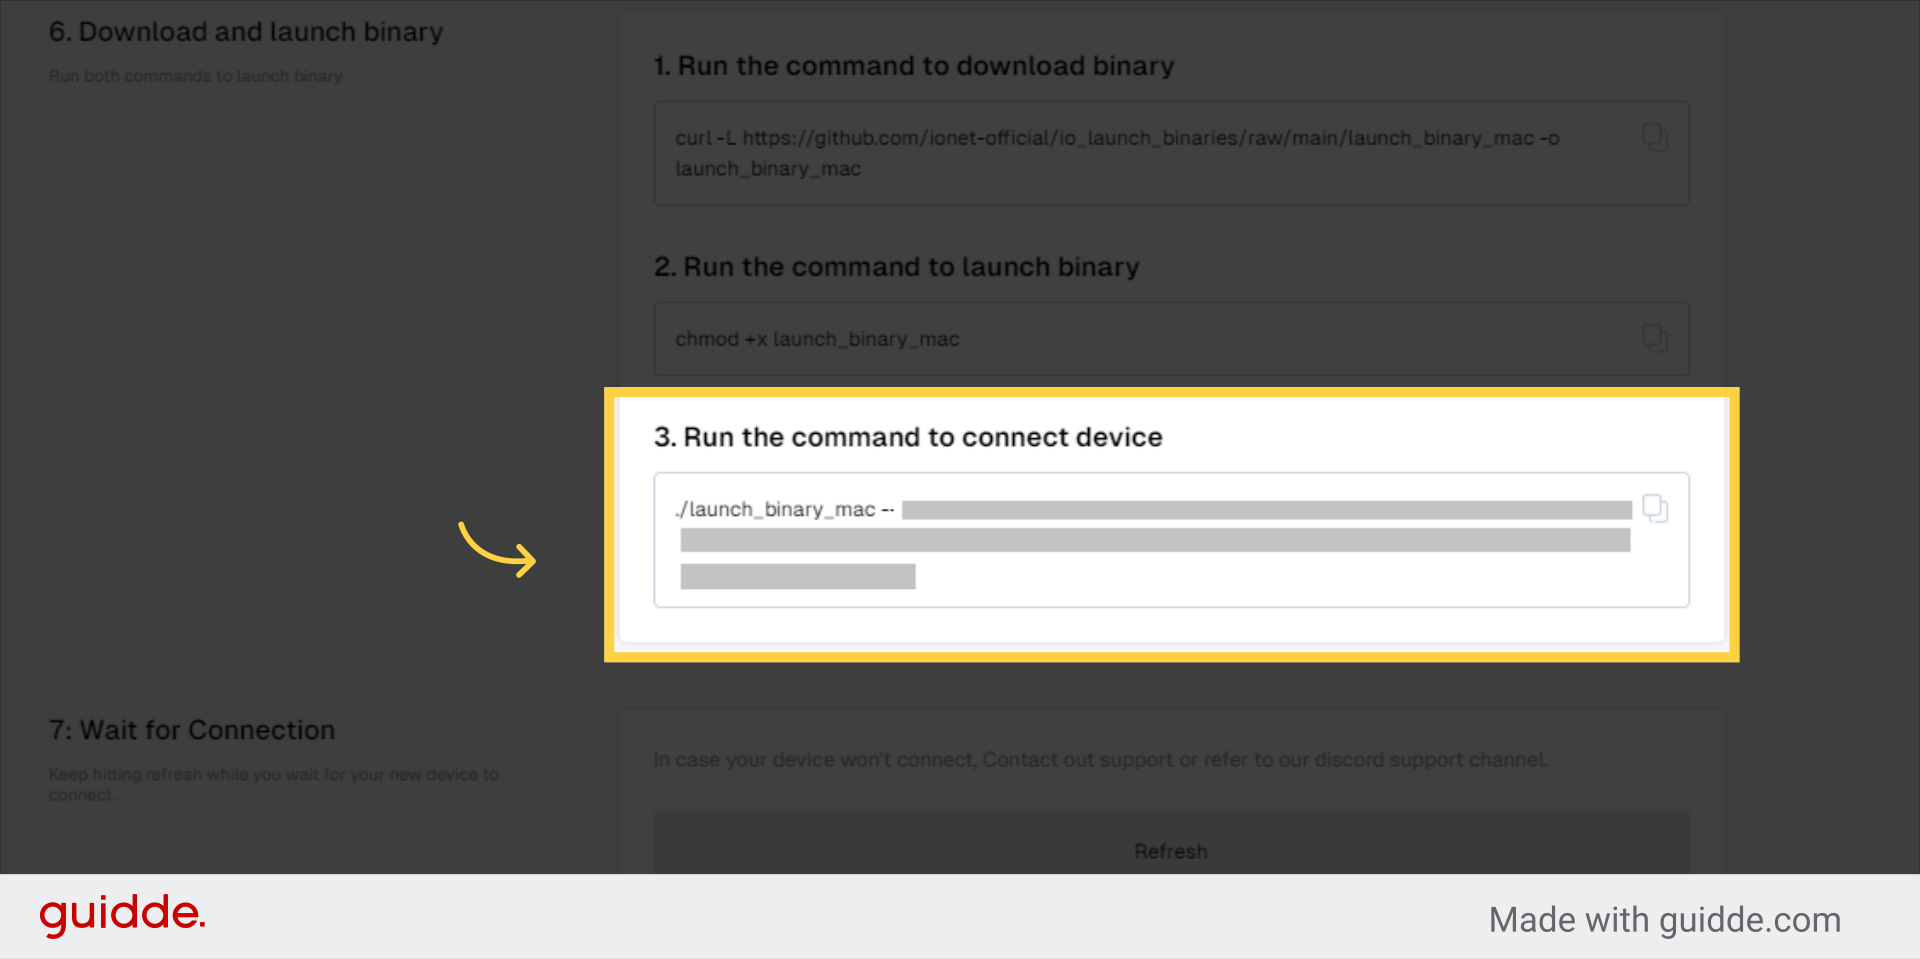
9. Run the command to connect device
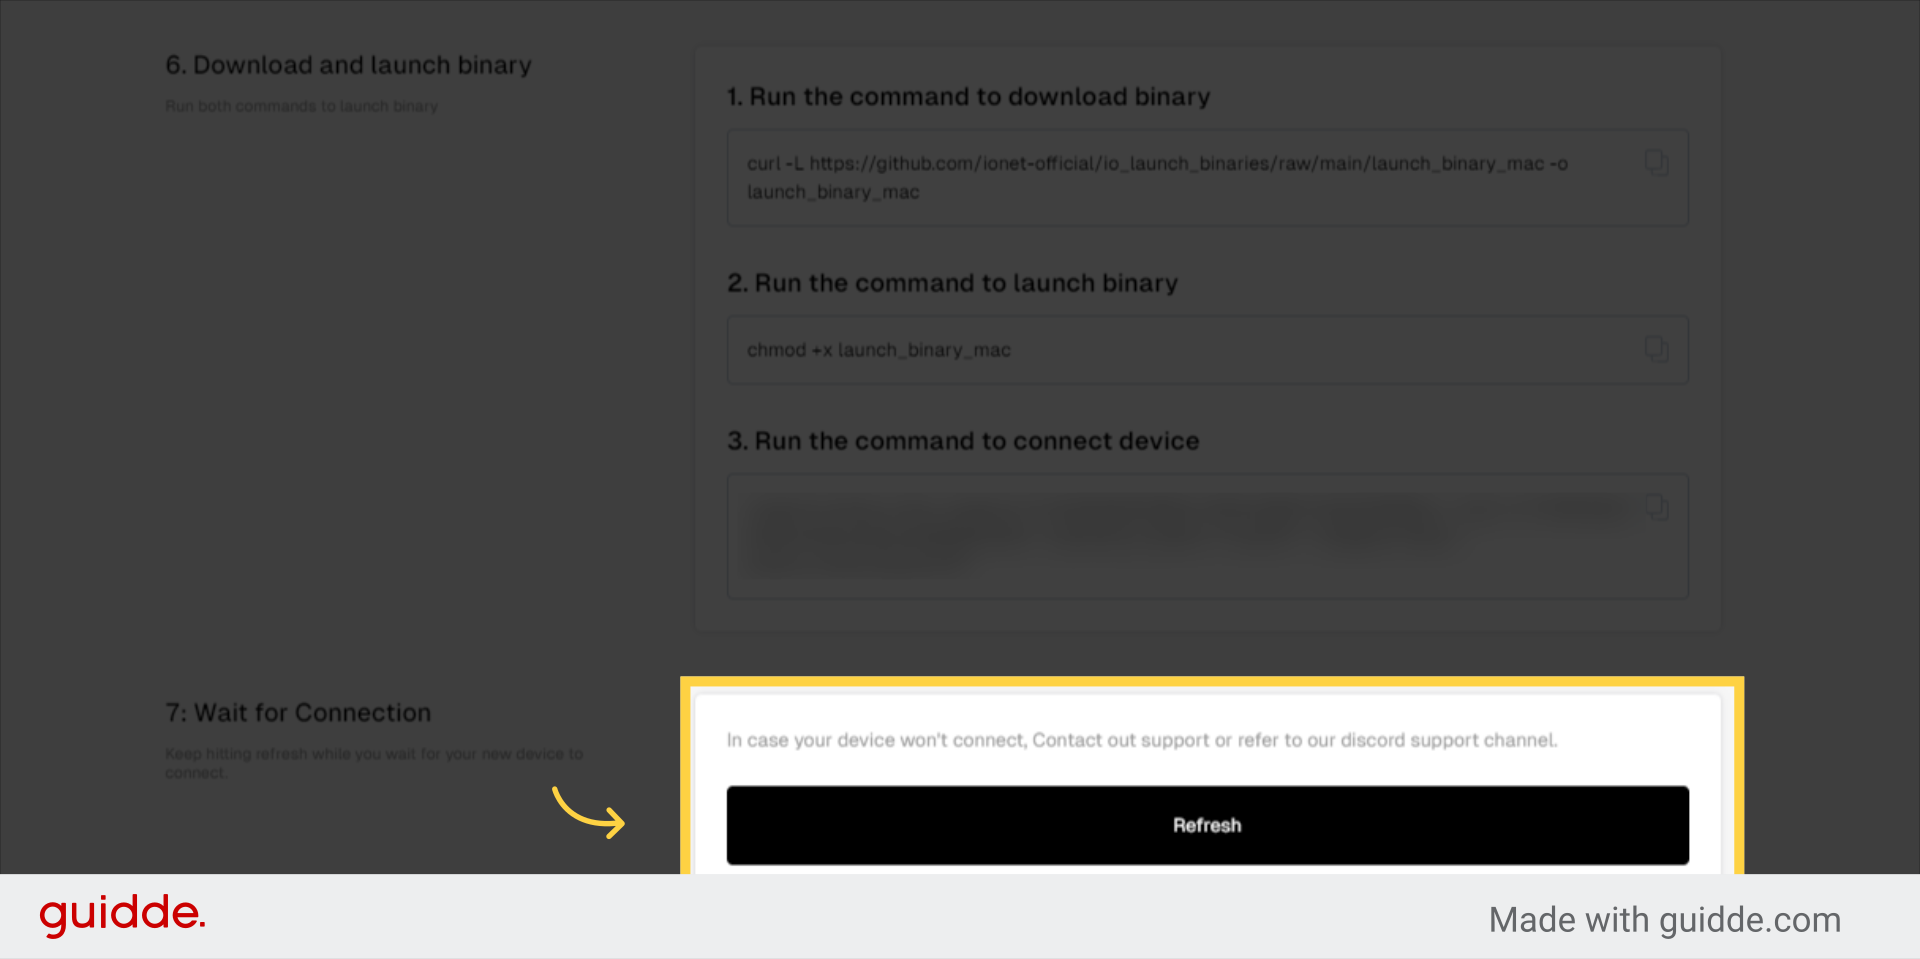
10. Keep hitting refresh while you wait for your new device to connect.
In case your device won’t connect, Contact out support or refer to our discord support channel.
Start supplying GPU power: Once your node is set up and your GPU is connected, you’ll automatically start contributing to the network and earning points.
- Go to “Earnings & Rewards”
- Click “set payout” and submit your Solana address
2. Complete Galxe Quests:
- Visit the Galxe campaign page: Go to the Galxe Quest page here to access the io.net Ignition program quests.
- Connect your wallet: Connect your crypto wallet to Galxe using the preferred wallet provider (e.g., Phantom, MetaMask, WalletConnect).
- Explore and complete quests: Participate in various tasks on the Galxe campaign page. These tasks may involve:
- Following io.net on social media (Twitter, Discord, etc.)
- Joining the io.net community forum
- Completing educational quizzes about io.net and its technology
- Referring friends to the io.net platform
Track your progress: Monitor your earned points and progress bar on the Galxe campaign page. The more points you accumulate, the higher your potential rewards in the airdrop.
Thank you !
This post was originally published on the solanafloor pages .However, I followed few articles and modified them a little bit.


