Introduction
Elixir is a modular DPoS network built to power liquidity on orderbook exchanges.
Elixir is cross chain and composable: enabling orderbook DEXs to natively integrate Elixir into their core infrastructure to unlock retail liquidity for pairs, among other exciting use-cases. The network serves as crucial underlying infrastructure allowing for exchanges and protocols to easily bootstrap liquidity to their books.
Funding
Elixir nears unicorn status following $8 million Series B funding round co-led by Mysten Labs and Maelstrom : The Block
The ELX Token
ELX is the future native utility and governance token of the Elixir ecosystem, powering consensus and allowing for holders to direct the future of the network.
With the eventual launch of mainnet, Elixir will fully decentralize. While this includes a fully decentralized network, it also includes community-led governance run by the ELX holders.
The overarching goal will be to
1. create effective governance mechanisms,
2. utilize ELX as a cryptoeconomic security incentive
3. Make the platform as decentralized and permissionless as possible.
Apothecary
Earn potions for contributing to Elixir. Brew potions by depositing assets and referring users.
Follow this link : https://www.elixir.xyz/apothecary
Install validator node on Elixir
Part 1: Order and configure your VPS
To get started with installing your node, you’ll first need to rent a VPS (Virtual Private Server). Using a VPS offers several advantages, such as enhanced performance, scalability and reliability. I’ll guide you through the process of renting a VPS at a lower cost, and show you how to configure it. Follow the steps below to get your VPS ready for the node installation. Research VPS providers: Take some time to explore different VPS providers available in the market. Consider factors like pricing, reputation, and customer reviews to find the right fit for your needs. Look for plans that offer the appropriate amount of resources (CPU, RAM, storage) to support your node. Contabo is my preferred choice due to their combination of affordable pricing, reliable performance, and user-friendly interface. I’d like to clarify that I am not affiliated with their partner program and there are no personal benefits for me in recommending their service.
Contabo use කරනවනම් USD වෙනුවට Euro use කරන්න, $4.5 monthly fee එකක් වගේ තමයි තියෙන්නෙ.(පලවෙනි පාර setup fee එකක් යනවා.ඒක දෙවනි මාසයේ ඉදන් අය වෙන්නෙ නැහැ ) පෞද්ගලිකව මම paypal එක connect කරල තියෙන්නෙ.
Minimum hardware specifications needed for this node:
- 4 CPU
- 4 GB RAM
- 30 GB SSD

Running an Elixir v2.0 Validator : https://docs.elixir.xyz/running-an-elixir-validator
Given the modest hardware requirements, I suggest opting for the Cloud VPS S package, as it offers a suitable balance of performance and efficiency for these needs.

I will initially select a rental period of 1 month, with the flexibility to extend it later if needed:

Make sure to choose the option “European Union (Germany)”:

For the best storage solution, I recommend selecting the 200GB SSD storage type.

To access Docker with Ubuntu 22.04, navigate to the “Apps & Panels” section and make the appropriate selection:

To prioritize security, I highly recommend to generate a password and securely store it to ensure maximum protection:

For the final step, it’s recommended to leave the sections titled “Object Storage”, “Networking”, and “Add-Ons” in their default state without any modifications. If you are new to Contabo, please create an account; otherwise, login using your existing credentials. Provide your personal data by filling in the required fields. Complete the remaining fields with your personal information, and click the “Next” button to proceed with the payment. After successfully completing the payment for your order, you will receive an initial email. Within approximately 15 minutes, you will receive a second email containing all the information needed to connect to your VPS.
Part 2: Connect to your VPS via SSH
Download and install most recent edition of PuTTY by visiting the official website: https://www.chiark.greenend.org.uk/~sgtatham/putty/latest.html

You will find the IP adress of your VPS in the second email. Launch PuTTY, enter the IP address of your VPS and click “Open”:

Once the server interface is open, you will be prompted to provide login details; simply enter “root” as the user and use your chosen password:

Congratulations! You are now successfully logged into your server:

2- Installation of Essential Components
Before diving into setting up your node, it’s crucial to update your VPS. To do this, simply execute the following command in your VPS terminal:
sudo apt-get update && sudo apt-get upgrade -y

You are going to install Docker on your machine.
Docker is a platform for running applications in “containers,” which makes it easy to deploy and run them on different machines without worrying about configuration differences.
Download Docker:
apt install docker.io -y

3- Wallet Preparation
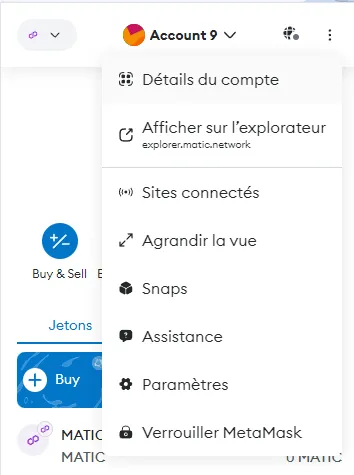
You will use a wallet to run your validator. It is advisable to use a wallet dedicated solely to Elixir.
You can generate a new wallet in MetaMask by clicking on the icon “+ Add account or hardware wallet”, then on “+ Add a new account”

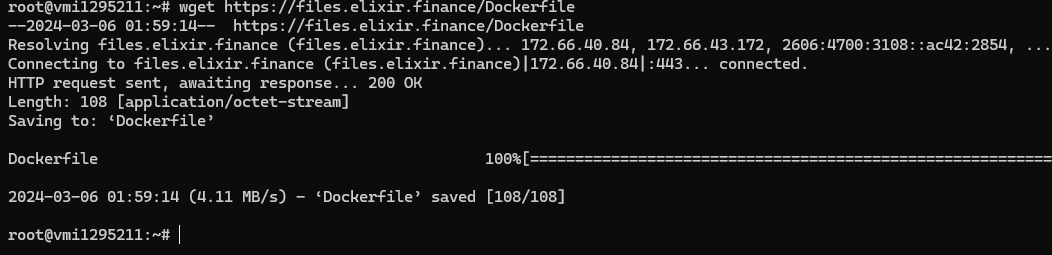
4- Downloading the Elixir File
Download the configuration file provided by Elixir:
wget https://files.elixir.finance/Dockerfile
Open the text file to customize it with your information:
nano Dockerfile

This will open a text file. Replace the < > placeholders with your information:
ENV ADDRESS=<ADRESSE_WALLET>
ENV PRIVATE_KEY=<PRIVATE_KEY_WALLET>
ENV VALIDATOR_NAME=<NOM>
You can name your validator by replacing <NAME>.
You can find the private key of your wallet on MetaMask by clicking on “Account details”, then “Show private key”.
After making the modifications to the file, you can exit the screen by pressing CTRL+X, then pressing Y and ENTER.

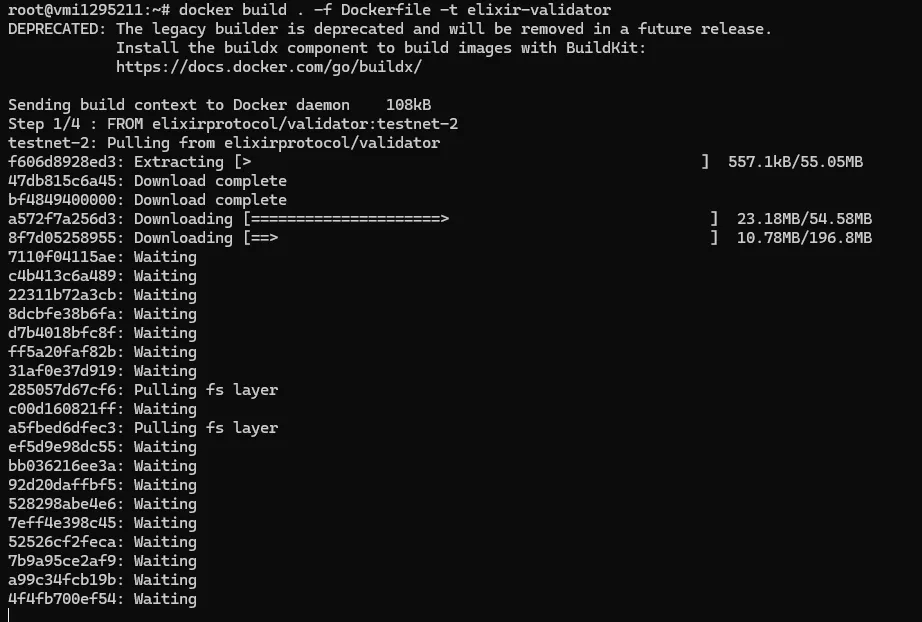
5- Validator Node Installation
Build the image of the validator node by executing the following Docker command :
docker build . -f Dockerfile -t elixir-validator
6- Launching the Validator Node
Start your validator node:
docker run -d --restart unless-stopped --name ev elixir-validator

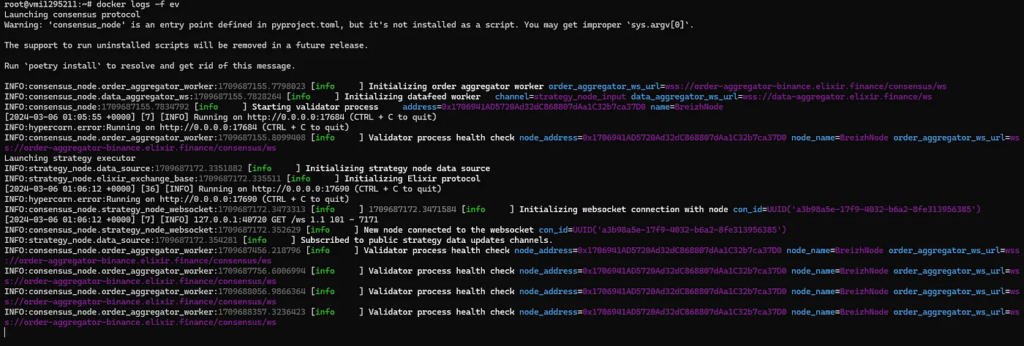
To check the log of your node :
docker logs -f ev
7- Enrolling Your Validator Node
Access the Elixir network dashboard using your browser connected to your wallet:
Log in with MetaMask and switch to the Goerli network.

You will need some Goerli ETH to perform interactions on the dashboard.
Claim gETH on Alchemy or Goerli-faucet:
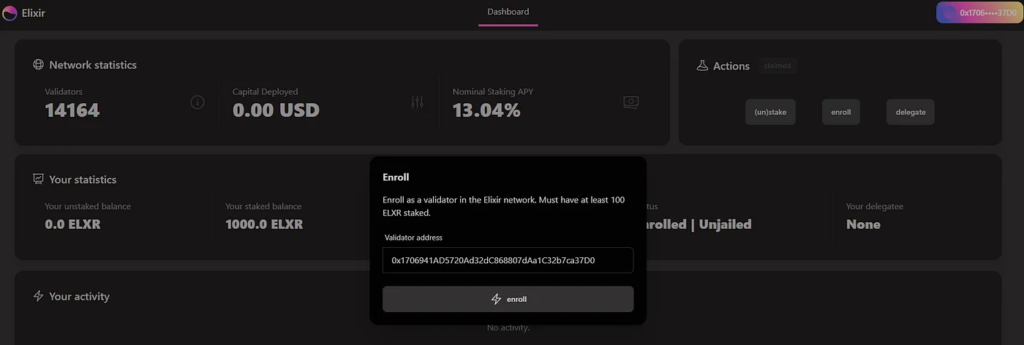
Claim your ELXR on the dashboard by clicking on “Claim 1000 ELXR”
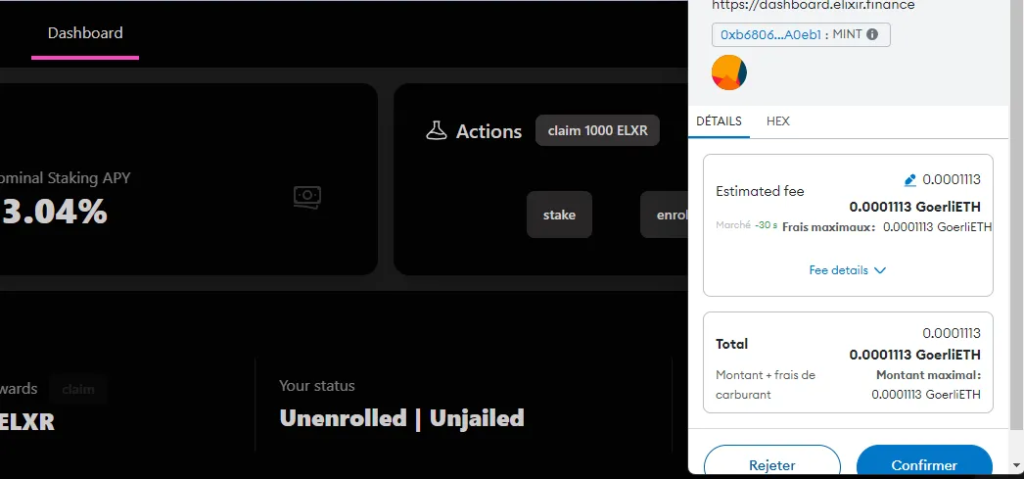
After receiving your tokens, you will be able to stake them. Press “Stake” and then enter an amount between 100 and 1000 ELXR.

Once you have staked your tokens, you will need to enroll your validator node. Click on “Enroll”.
You can verify that your node is working from your VPS.
docker logs -f ev
Done !
**With the deprecation of Goerli Ethereum on 03/13/2024, enrolling validators onchain (via ELX faucet) for testnet v2 has been paused. This will be re-enabled for validators on testnet v3, which will use Sepolia for onchain fraud proofs.**
This article was initially posted on the @BreizhNode page. However, I’ve thoroughly reviewed couple of articles and made some modifications. I’d like to include his donation address. If you find this article helpful for your work, please consider making a small donation to support him and appreciate his efforts.
If you wish to support my work, I’ve created a dedicated wallet for this purpose:
=> 0x8AF4A2ec91469aBda8Fc36571D4f50A581215D29
Thank you !


